
How to create a digital clothing display with impact

For a recent research and development project at Magnopus, we were tasked with showcasing sports clothing in an innovative way. The idea for this piece was to create a feature installation of mannequins in progressive phases of motion like a zoetrope, but static. We wanted to showcase clothing in a way only a digital environment could allow, like incorporating floating mannequins or clothing frozen in movement and interactivity.
The theme of the environment was sportswear, so the “zoetrope” was a good way to show what the clothing would look like in action.
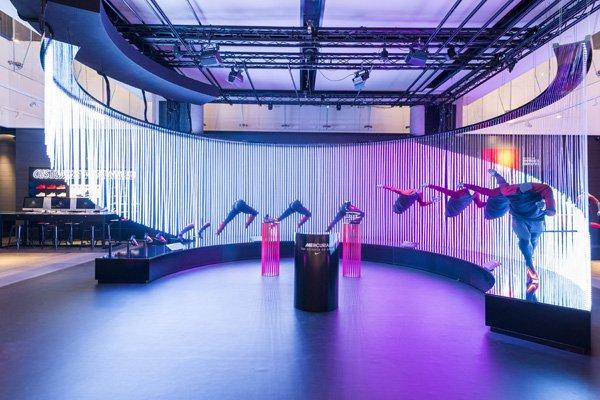
This image came up as one of the inspirations, an eye-catching Nike installation.
Explorations
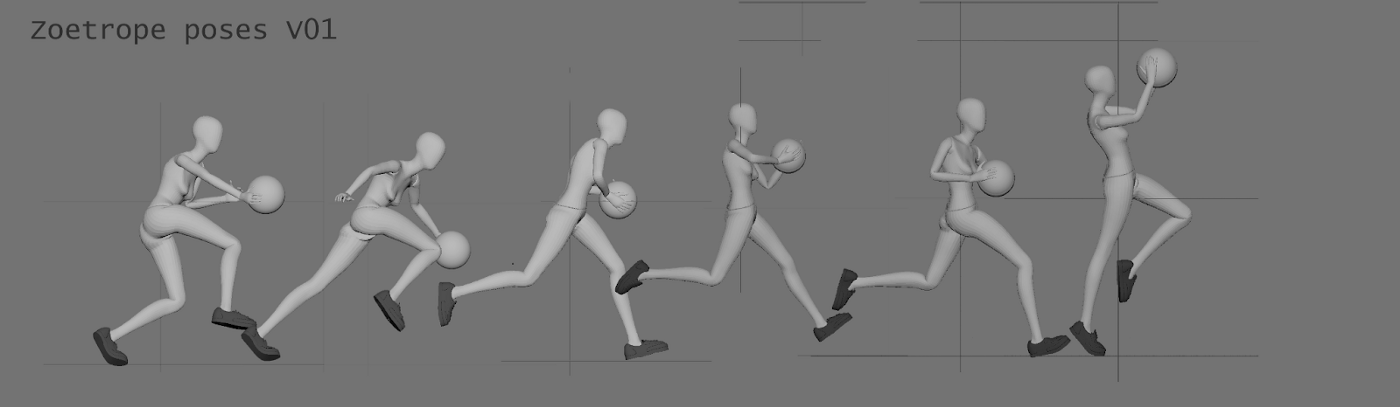
While the vision for the project was still under development, I quickly mocked something up to start the conversation around the form it could potentially take. Here, you can see my first version of a mannequin doing a jump. I used a model we already had and used Mixamo to quickly rig and animate her. I found this jumping animation and picked the poses I wanted for the very first test:

Credit: Magnopus
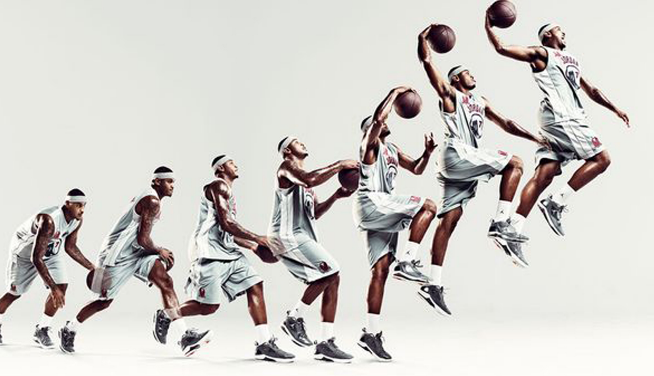
After feedback from the team, we decided to create a basketball lay-up motion, which would go well with the basketball theme that was starting to form in the environment. As there wasn’t a ready-made animation on Mixamo, I posed the sequence manually.
Our art director, Emerick Tacket, gave me this great reference to work with:

And this was the initial result:
Credit: Magnopus
Deciding on a mannequin
After this second attempt, we decided that this mannequin was too long and leggy and we needed to find a slightly different model. As we had decided on a faceted design aesthetic, the small details of the mannequin didn’t matter too much. This was the asset we chose from Turbosquid because the body shape was more in line with our vision:

The model was already rigged so that was nice and easy to work with. I moved on to posing this asset at a later stage but was excited to get into Marvelous Designer (a software specifically created for cloth simulations) to work on the clothing for the mannequin.

Credit: Marvelous Designer
Creating clothing
I collated a couple of images of female basketball players that looked cool in a mood board before I began. I talked it through with my art director and that gave me a good idea of what direction we wanted to go. Then, I did a 2D design pass to again refine the idea and give my team a chance to feedback and direct the project. This is something I would highly recommend any artist doing, to avoid putting excess time into a design that doesn’t make the cut. It’s better to do a little bit of exploration upfront, rather than starting your 3D work and realizing there are things that need to change! Rather than picking random colours, I looked at existing shoe designs and colour schemes to inform my clothing design. These were my finished colour studies:

**Pro-tip, make the numbers on the shirt match the design numbering, to make discussing the shirts easier! ** Credit: Magnopus
The team decided on a combination of design numbers 4 and 5. Since angular shapes were a design element we were going to pull throughout the space, the shapes of design 5 were very fitting. The sunset-esque colour scheme of design 4 would stand out on the purple background we were planning on having. It was also decided we wouldn’t go with knee pads.
After I got the go-ahead, it was time for me to get started on creating the clothing in Marvelous Designer. Such a great piece of software! I’ve done clothing in a variety of different software before, but it always takes longer, and the result is rarely this good. For anyone trying something similar, if you want to be really fast, use the T-shirt and shorts templates and alter them. It’s far more efficient than trying to figure out how to do it yourself from scratch!
This was what my result looked like:

Credit: Magnopus
The poses would continue to be tweaked right up until the project was finished. The reference had also changed a bit, this one being my main ref image:
I quickly posed the rig and simulated the clothes. Curious to see how it would look, I took screenshots of my result in Marvelous Designer and put them together in Photoshop. Lastly, I added an orange dot to indicate the basketball. Here’s the result:
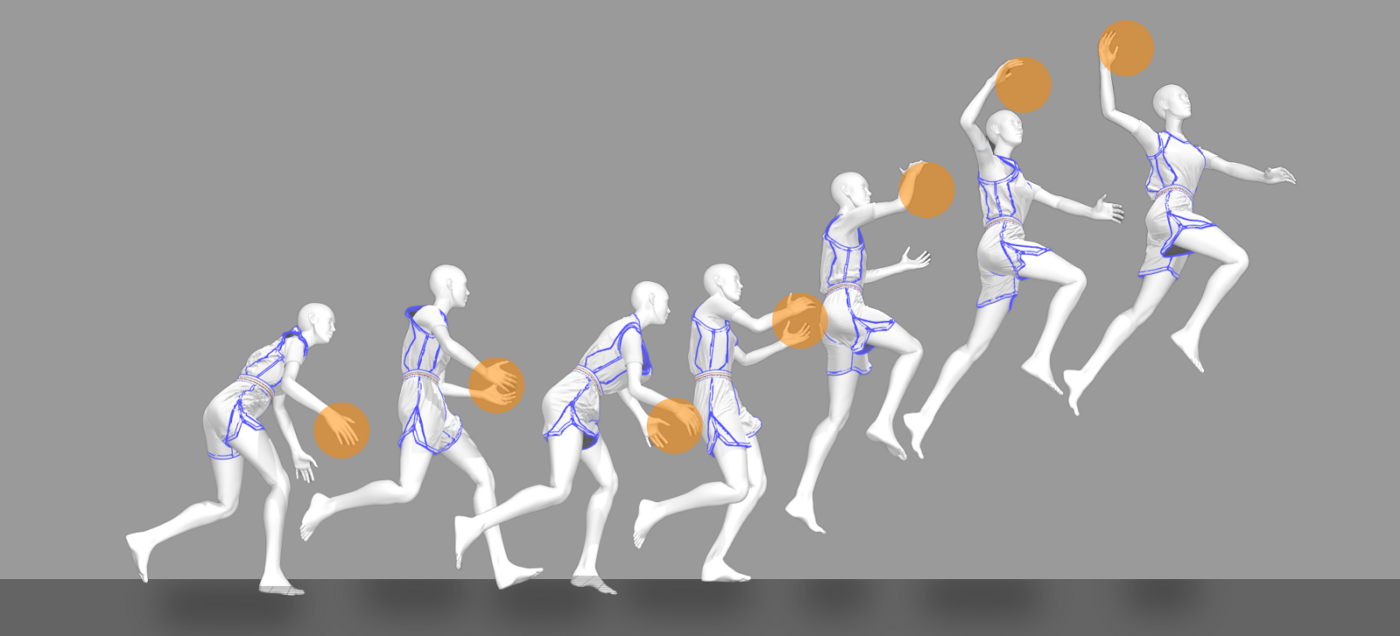
Credit: Magnopus
UV unwrapping and texturing the clothing
To UV unwrap them, (which means giving a 2D coordinate to every vertex in the 3D model, so we can apply an image over it), I used the handy function in Marvelous Designer which lets you use the pattern pieces as UV shells. All I had to do was arrange them in a square.
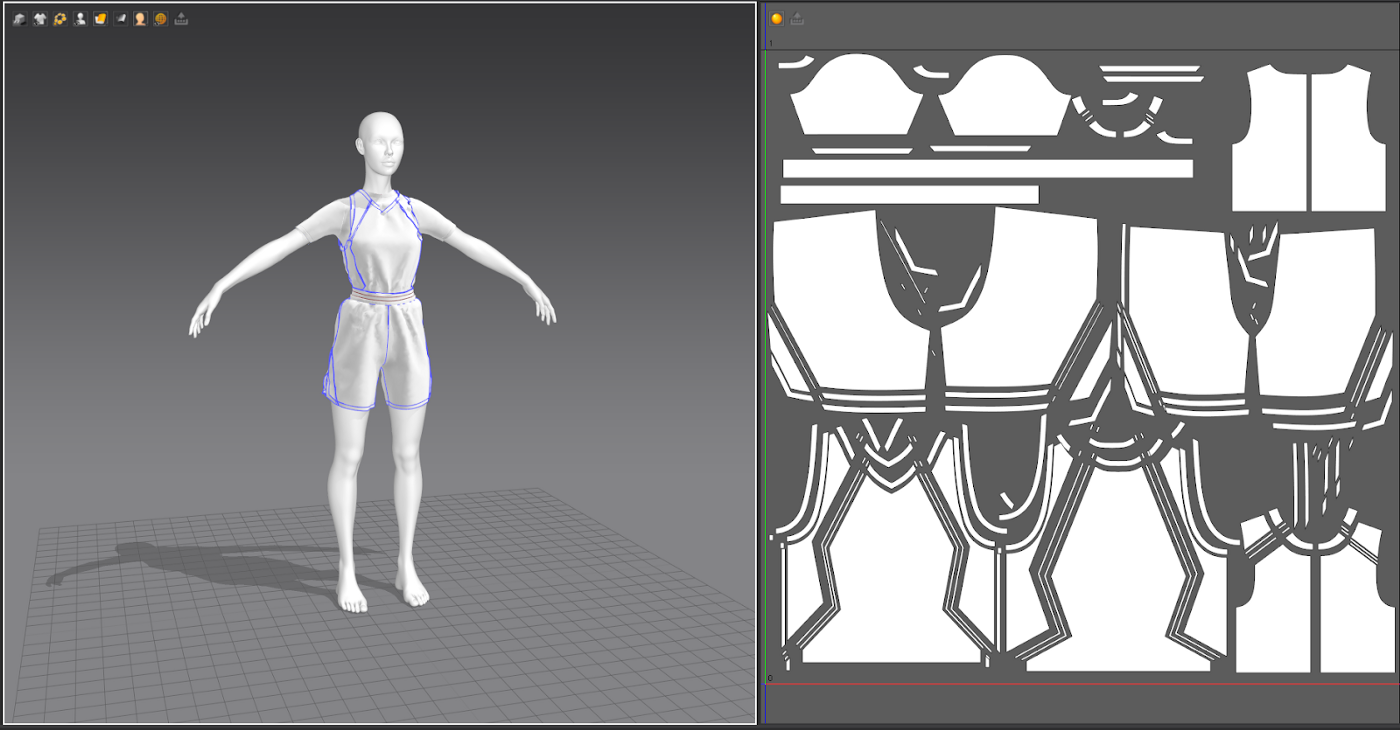
Credit: Magnopus
The UVs would stay the same throughout the animation, but the asset was very high detail, so it needs to be optimized for the engine we are going to use them in. For now, I exported one of the outfits to texture them in Substance Designer.

Credit: Magnopus
The texturing process went smoothly because everything was already cut up in the right patterns.
Making the assets engine-ready
While this looks great at the moment, this is what we call a ‘high poly’ model — a very detailed design that wouldn’t perform very well in engine because it is very performance heavy.
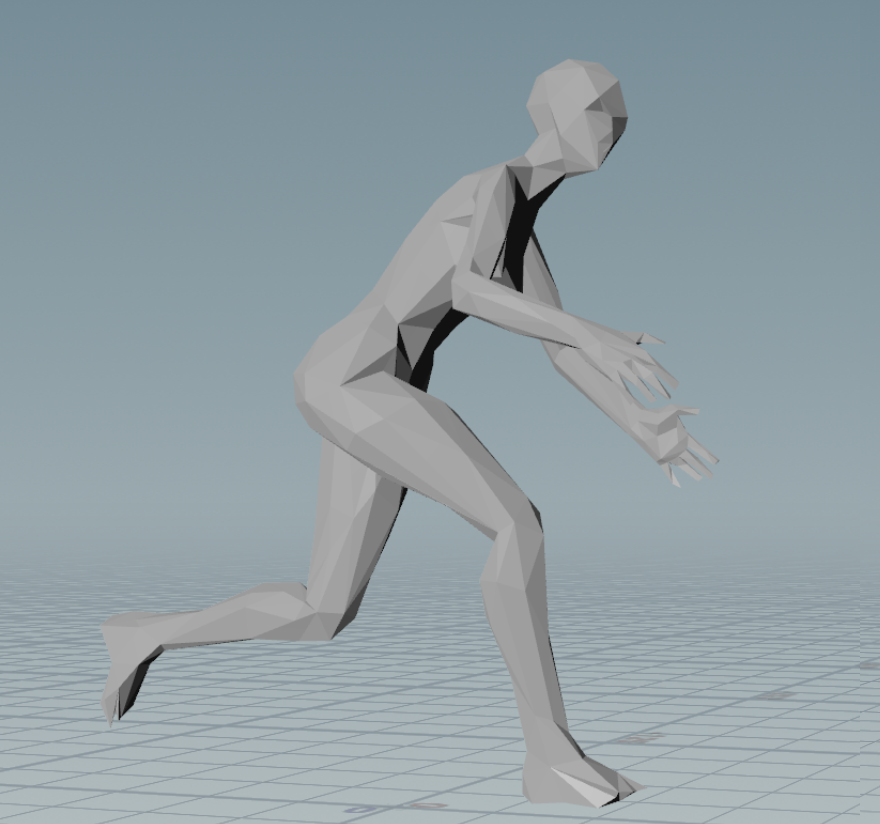
Every asset in a game engine is made up of these triangles, or polygons, and the more of them there are, the more detailed the asset will look. However, it can hinder the performance of the environment, so to combat this, assets need to have their polygon counts reduced without losing too much detail.
In the example below, you can see how the high poly count face has a lot of detail, but would be difficult to render in real-time. The models on the left are still recognisable as faces but would be much more performant. This is what I needed to do with the clothing.

So, I needed to reduce the number of faces that make up the mesh significantly for it to fit in our project.
This was twofold, I had to reduce the poly count of both the character (we were going for a faceted style for the mannequins) and the clothing, ideally together, because that way I could immediately test their compatibility. I also wanted to create an easily repeatable workflow, so I could do all of the clothing assets in different positions in a quick way. I decided to use Houdini for this, as it has excellent functionality for automating repetitive tasks. This means I could load in all my models and Houdini would repeat the same steps for each of them.
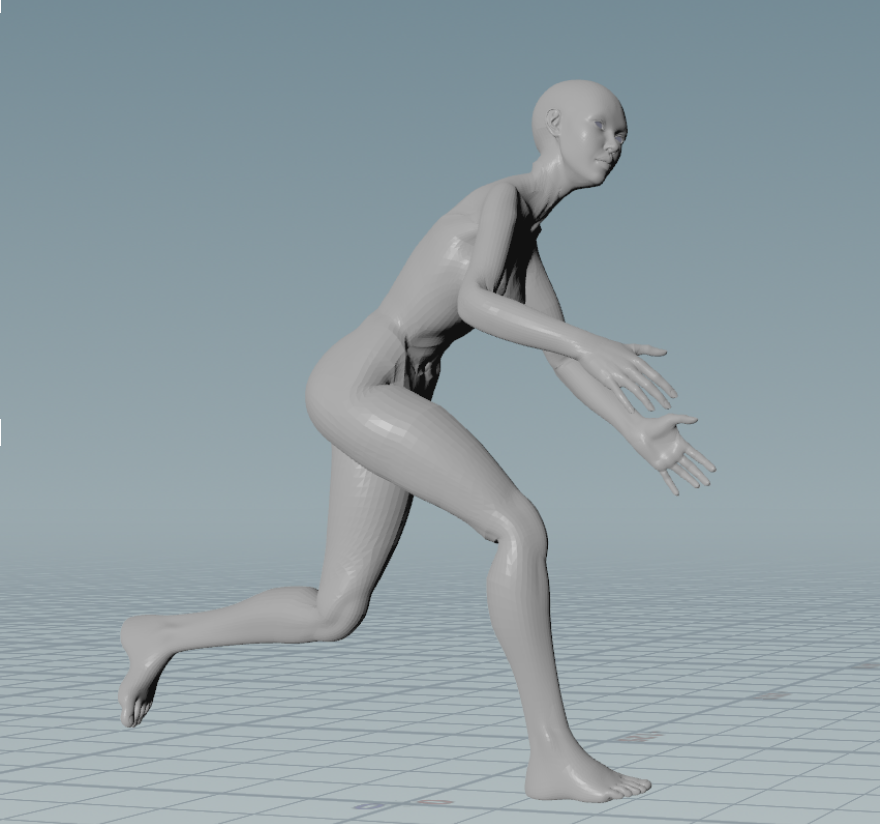
I started with the mannequin:
The mannequin was supposed to match the faceted style of this basketball player.

Credit: Magnopus
From top to bottom my steps were:
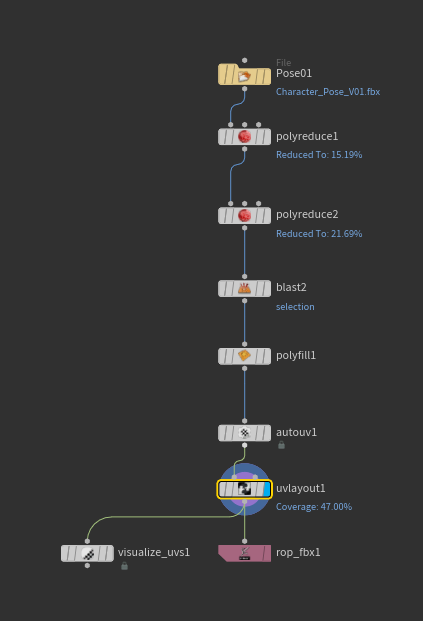
Pose 01: loaded in my character
Polyreduce1: reduced the triangle count quite dramatically
Polyreduce3: reduced everything further except the hands, because I didn’t want to lose the fingers
Blast2: removed the geometry inside the mouth that would not be seen
Poly fill1: filled the holes in the model left by the removal of the eyes and mouth
Auto UV & UV layout: these nodes are for unwrapping the 3D model, to make it ready for texturing. An automated unwrap for this model since it’s going to have a very simple material applied
The Visualize UVs just let me check what their application looks like
Rop fbx: here I exported the model into an FBX file, a file format that is used to provide interoperability between digital content creation applications
And here’s the result:
For the clothing, I did this:

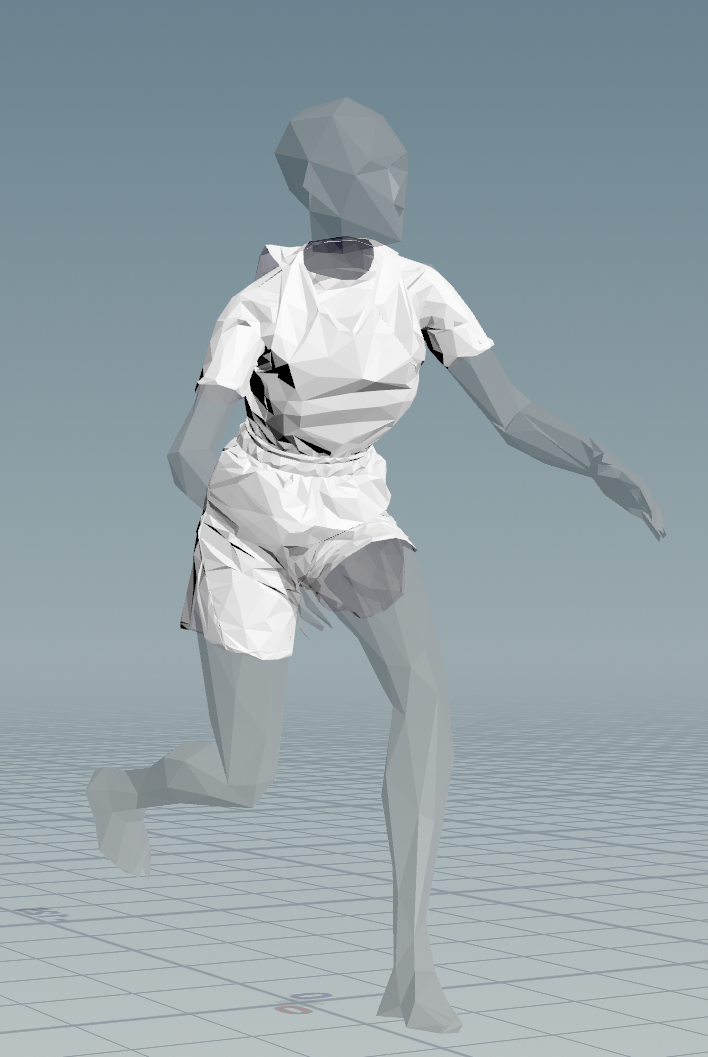
I loaded in the highpoly and then it got split into two branches.
On the left branch, I prepared my lowpoly, I gave it a material, reduced the triangle count to an acceptable level and fixed the normals.
On the right, I prepared my highpoly, I fixed the normal and in the material, I loaded in the colour maps I exported from Substance Painter. In this case, just the base colour and the roughness.
In the maps baker, all my maps got baked down from the highpoly onto the lowpoly. I did this because I wanted to use the lowpoly asset, but I wanted to keep the nice detail of the highpoly asset. The maps baker created a set of maps that indicate where the detail will be on the surface of our lowpoly model I baked a normal and ambient occlusion map, the base colour got adjusted to fit onto the lowpoly (which has different UVs since the generated mesh is completely different) and everything, including the lowpoly asset got exported in the selected output folder.
Here’s an example of a highpoly with the base colour on it and the corresponding, generated lowpoly:
As you can see, they fit nicely on top of the mannequin
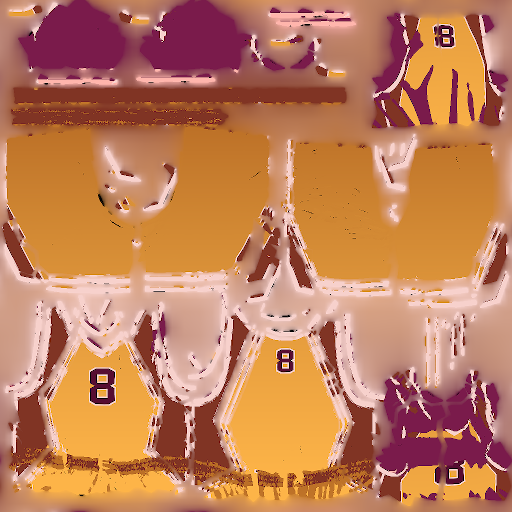
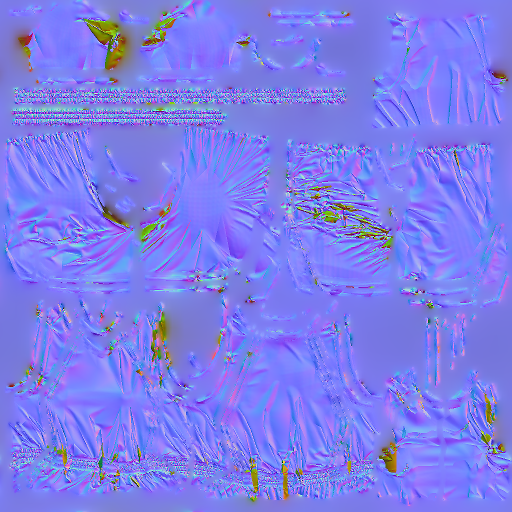
Here are the different maps that were exported:
If you want to learn more about these maps and why we use them, check out this resource: Allegorithmic pbr guide
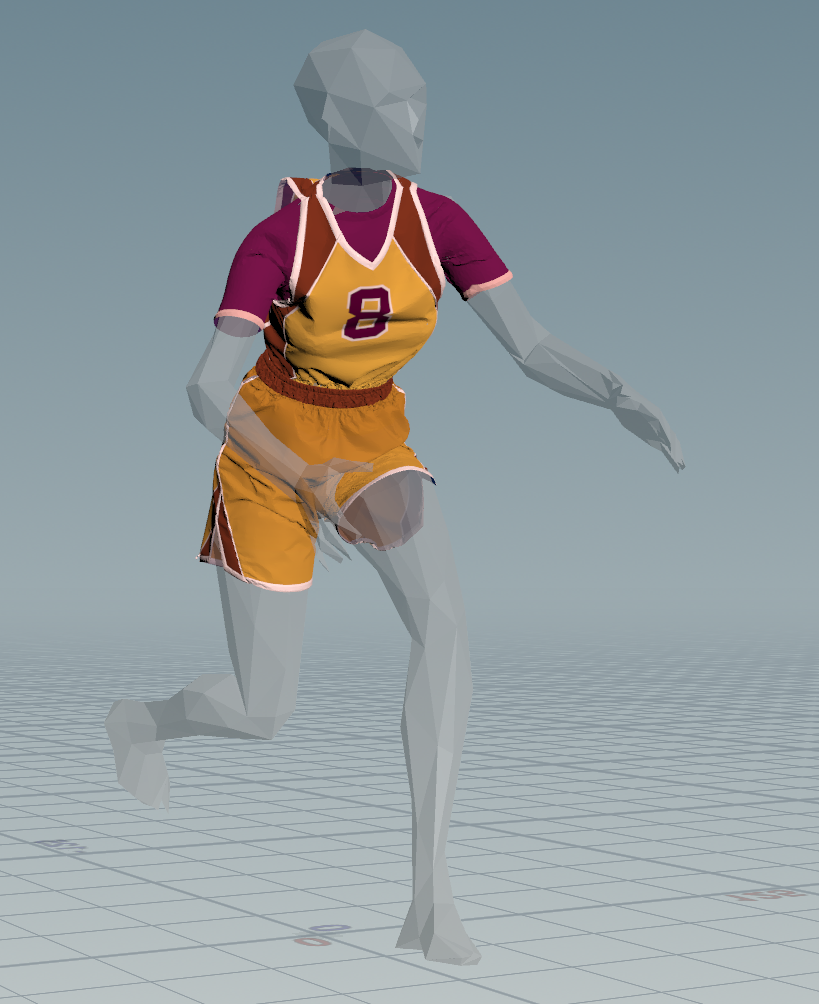
It was time to import the model into Maya and work on some final touches. I added in the shoes provided by my teammate and removed the internal geometry, as it won’t be visible in the final result. Then, I imported it into Unreal Engine, because I was very curious to see what it would look like. I added a basketball that was already in the scene and made it glow brighter as the mannequin came closer to the imaginary goal, to give it some exotic edge and more epicness. Here’s what it looked like the first time I imported all the meshes and set up the materials with the generated maps:

Credit: Magnopus
Final touches
I made some final tweaks to the poses, refined the fingers and shoulders and fixed the smoothing groups
And here’s the result of that:

Credit: Magnopus
The art director really liked my idea of the glowing ball, so the FX guys added an interactive version that would light up when you walk by:
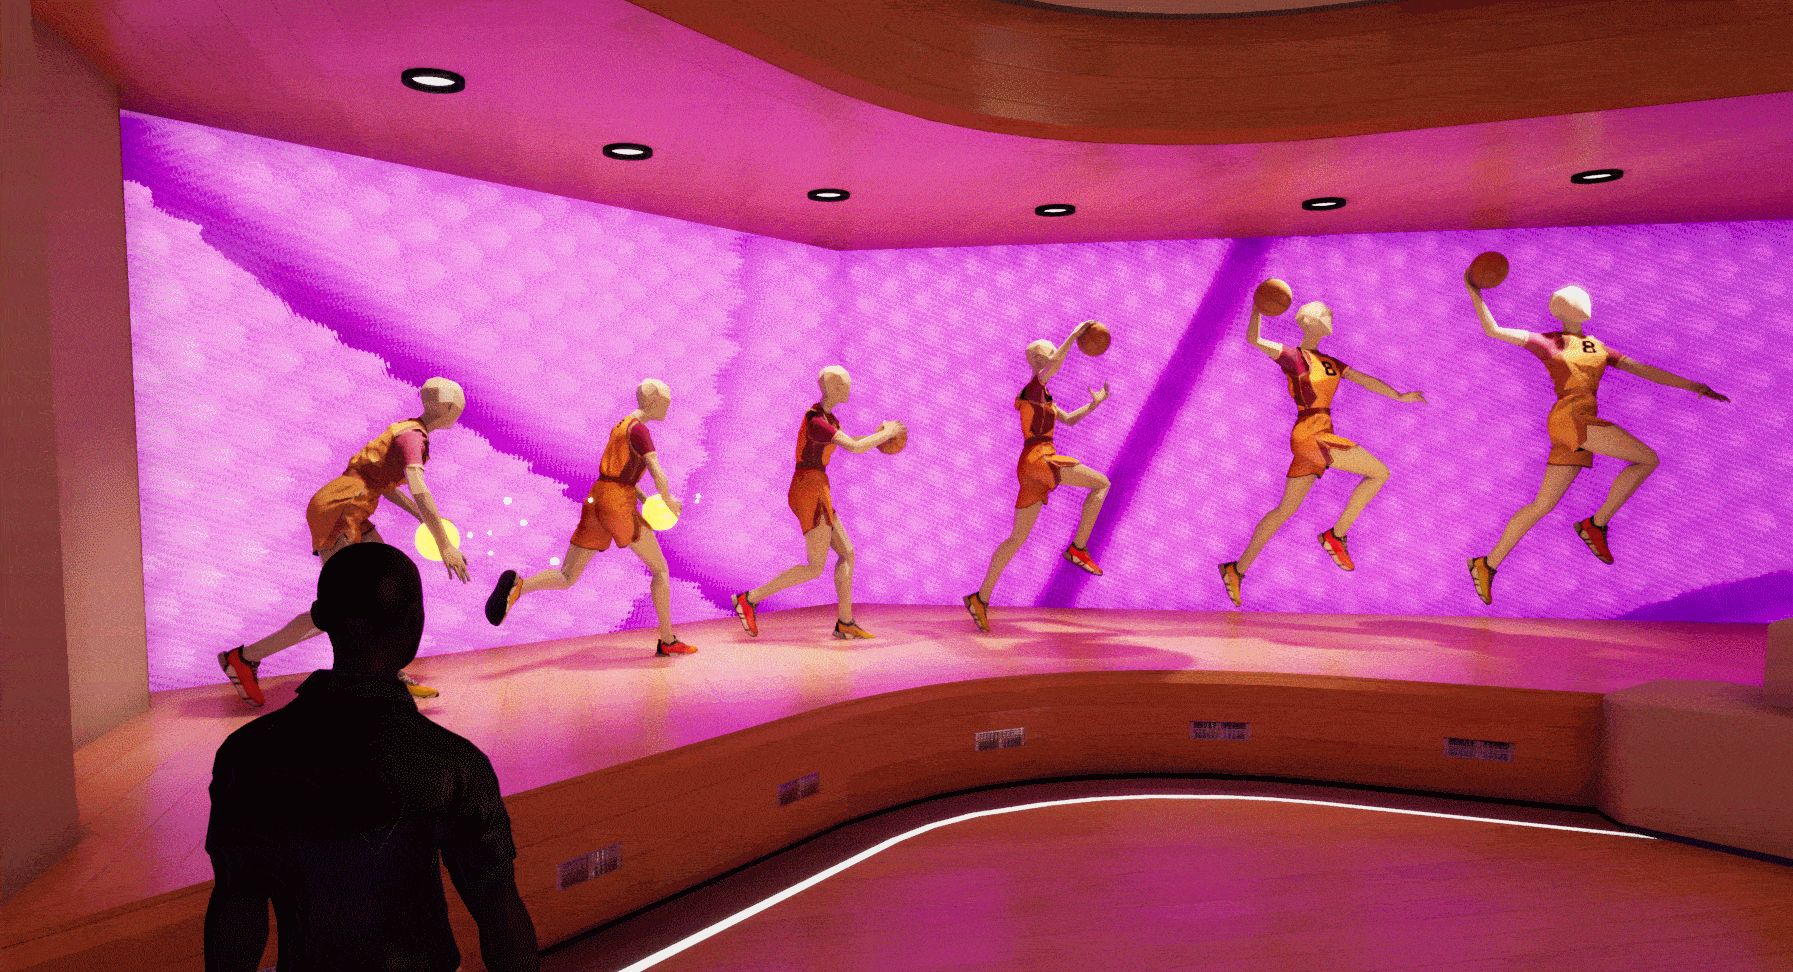
Credit: Magnopus
In conclusion, I ended up using this workflow to create a whole series of mannequins, with a wide variety of outfits.

Credit: Magnopus
If you give this type of project a go, share your results below and feel free to reach out with any questions. Happy creating!