
Work smarter, not harder: Using UV-driven workflows to master complex 3D iteration
Sometimes, we can’t just "paint" details onto a 3D object to make it look real; we actually have to build those details into the physical model. Think of it as the difference between painting a brick pattern on a flat wall (texturing) versus stacking individual physical bricks (modeling).
Usually, we handle these complex tasks using traditional methods such as instancing or sculpting. While these methods get the job done, they come with a few major drawbacks, which can not only make our job more complex but can also have knock-ons to a project schedule.
By shifting to a UV Blendshape workflow – this creates mesh deformations based on matching UV coordinates rather than relying on identical mesh topology – we help solve some of the biggest bottlenecks in the modeling pipeline.
| The problem (traditional) | The solution (UV Blendshapes) |
|---|---|
| The manual grind: Building one complex version can be a grueling 2-3 day manual task. | Massive efficiency: Once the system is set up, you can produce 10 different variations in a single day. |
| The "Start Over" problem: Making a structural change often means scrapping hours of manual work and starting from scratch. | Global iteration: Change the master “flat” base, and the details can easily be updated across the entire model. |
| Broken details: Technical details (like how textures sit on the surface), such as UV maps, can break easily when things are moved around, requiring tedious manual repairs. | Locked details: Since the pattern is applied to a flat map first, UV coordinates stay aligned with the geometry, preventing the stretching or "breaking" that usually occurs during complex 3D revisions. |
| Creative rigidity: You are often “locked in” to your initial asset choices once the modeling phase is complete. | Creative flexibility: We can create incredibly complex shapes using any "building block" we want. Once the system is set up, we can easily swap out parts. |
We use the more complex "brick-stacking" route for two main reasons:
Real-world physics: If an object needs to break, move, or react to gravity in a simulation, it needs to have a real physical structure.
Client requirements: If a client provides us with a specific 3D part or asset to use, we have to build our model around that exact piece to ensure everything fits perfectly, e.g., Lego bricks.
The secret: work flat
This technique was originally perfected for film projects, where we needed a way to apply intricate patterns – like complex Celtic knots – across dozens of different building shapes. The secret was keeping everything flat during the design phase.
Think of it like decorating a piece of wrapping paper while it’s lying flat on a table, rather than trying to draw perfectly straight lines after it’s already been wrapped around a box. By keeping our models "flat" and editable, we can apply those lines with greater accuracy and simplicity than traditional modelling methods.
How it works: a software-agnostic approach
The best part? This process fits easily into any artist's routine who is already familiar with 3D modelling. While I personally use Modo for the initial building, the same results can be achieved using any 3D package – the software doesn’t matter, it’s the methodology that’s important
To make sure the final files work widely for everyone else in the industry, the prepared assets are then taken into Maya to “wrap” the shape before moving it back into your package of choice. Here’s why that’s a win:
No expert knowledge needed: We use a small, automated script to handle the heavy lifting. You don’t need to be a tech wizard or a Maya expert to get great results.
Industry standard: By finishing the work in Maya, we ensure the files are compatible with almost any other professional studio or software.
Seamless fit: It’s designed to be a "plug-and-play" addition to the work we’re already doing, not a total overhaul of how we work.
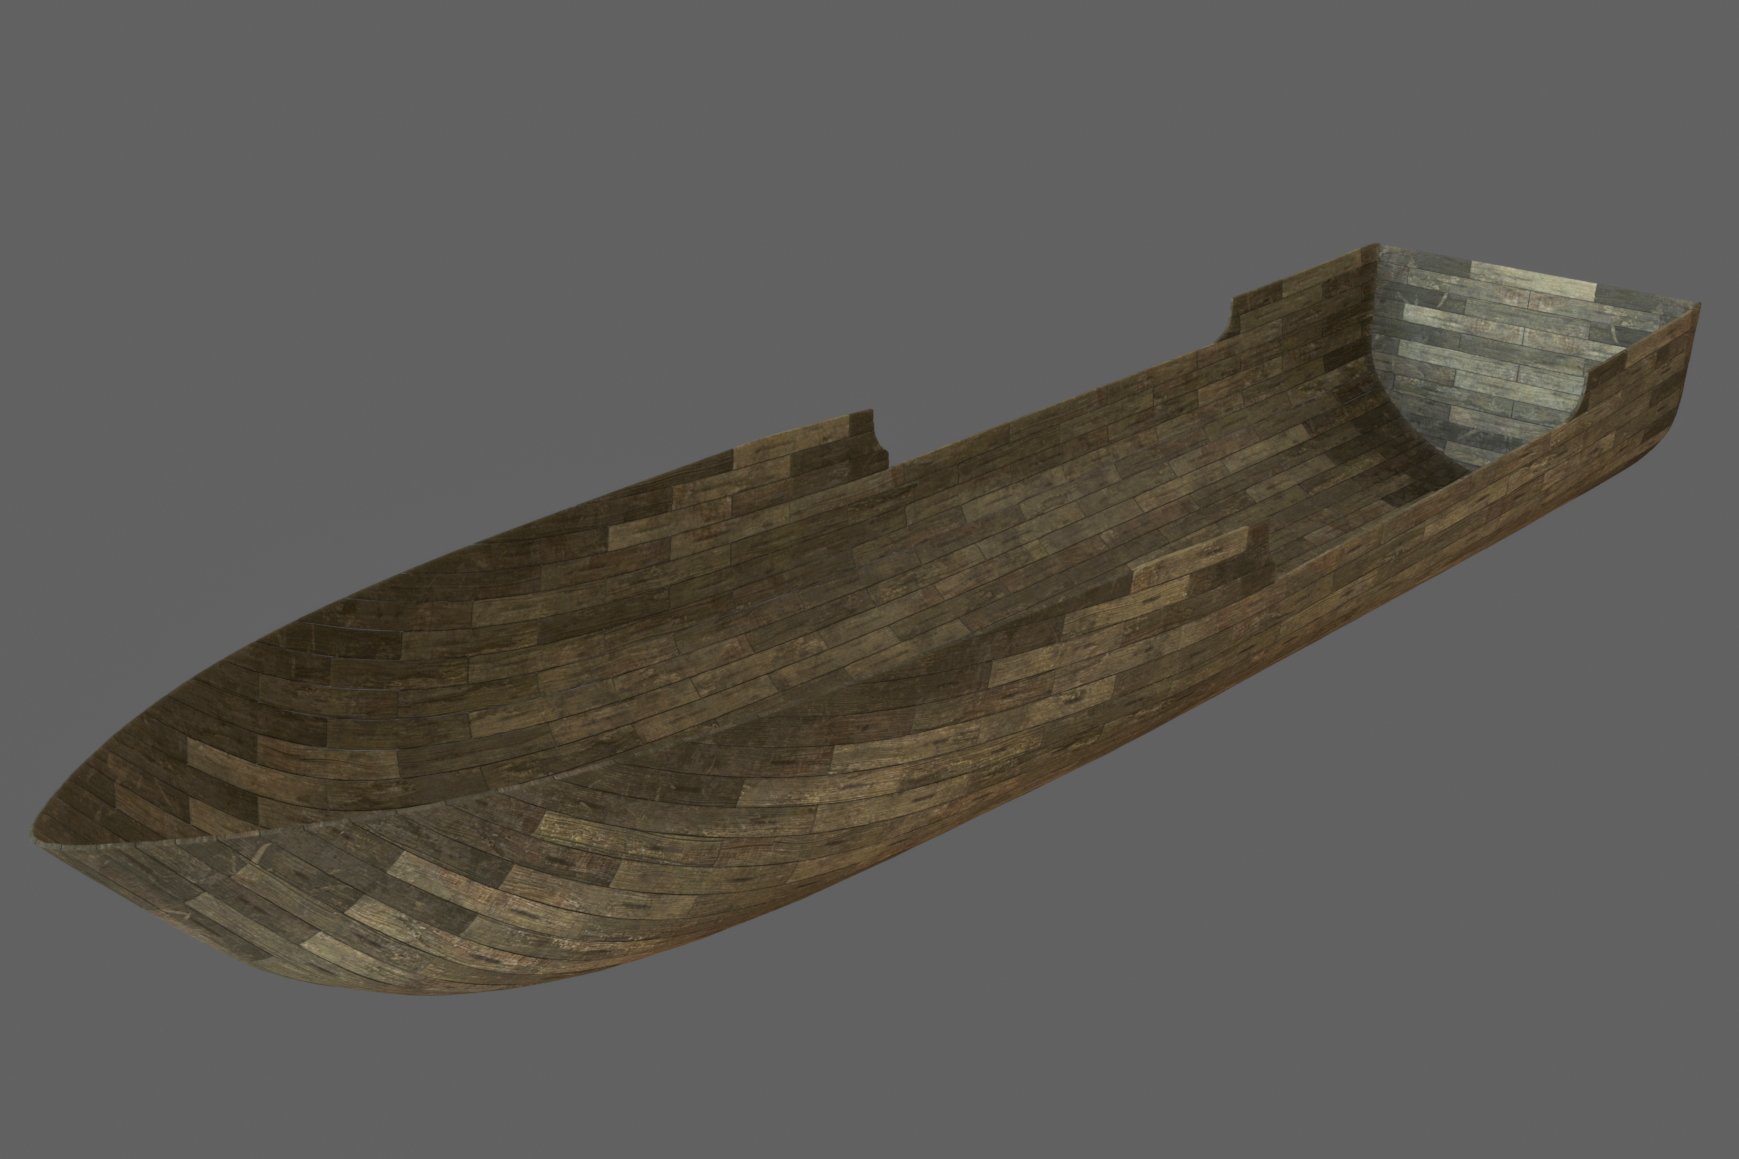
Before we dive into the technical work, we need a clear plan of attack. We usually start with a concept sketch or, ideally, a base model provided by the client. This acts as our "digital skeleton”; from there, we look at how the object would be built in the real world.
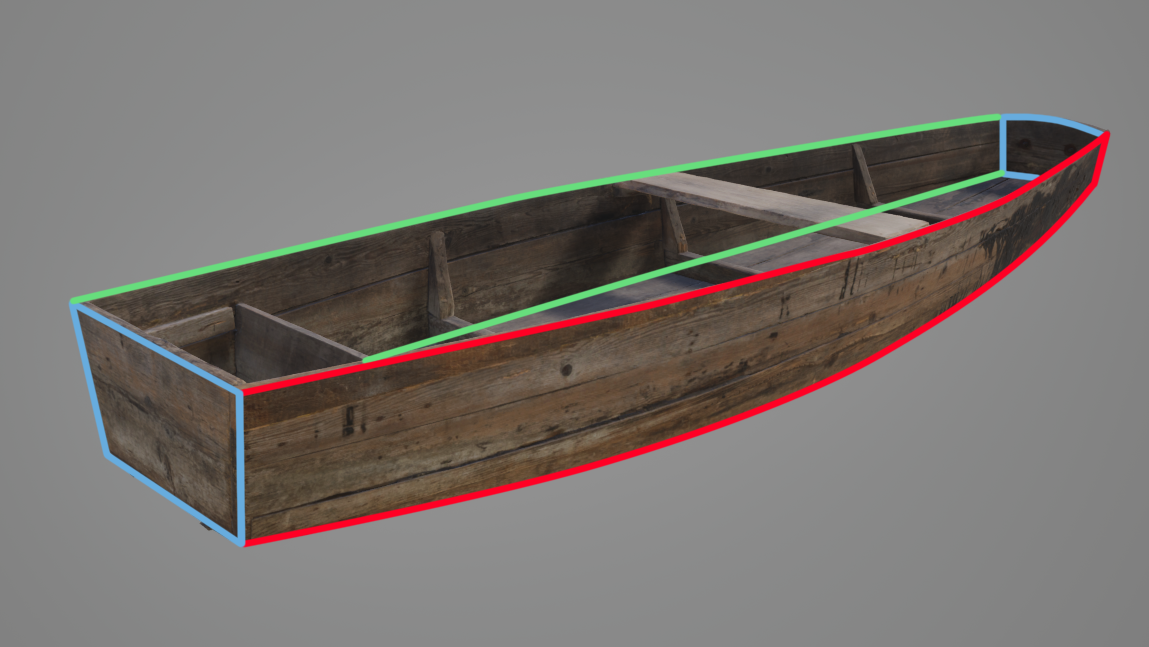
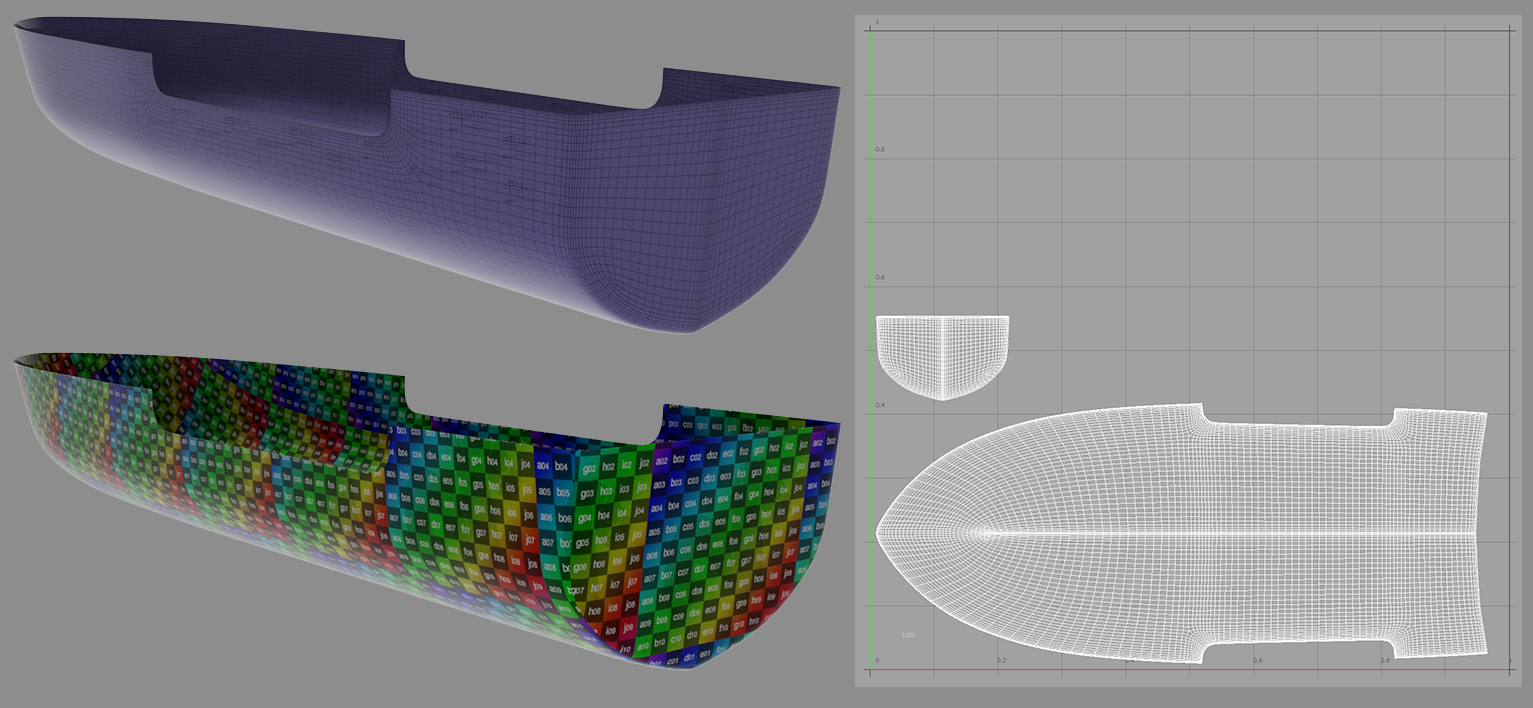
We break the big shapes down into smaller, realistic parts. If we’re building a boat, we don’t just treat it as one solid block; we look at the individual wooden planks and their layout. We make sure the "grain" of the materials follows the right path. For a boat, this means ensuring every plank curves and flows exactly how a shipbuilder would lay them out.
By starting with a realistic structure, the final model doesn't just look like a 3D image – it feels like a real, tangible object. It ensures that when we apply our textures later, they sit naturally on the surface rather than looking "pasted” on.
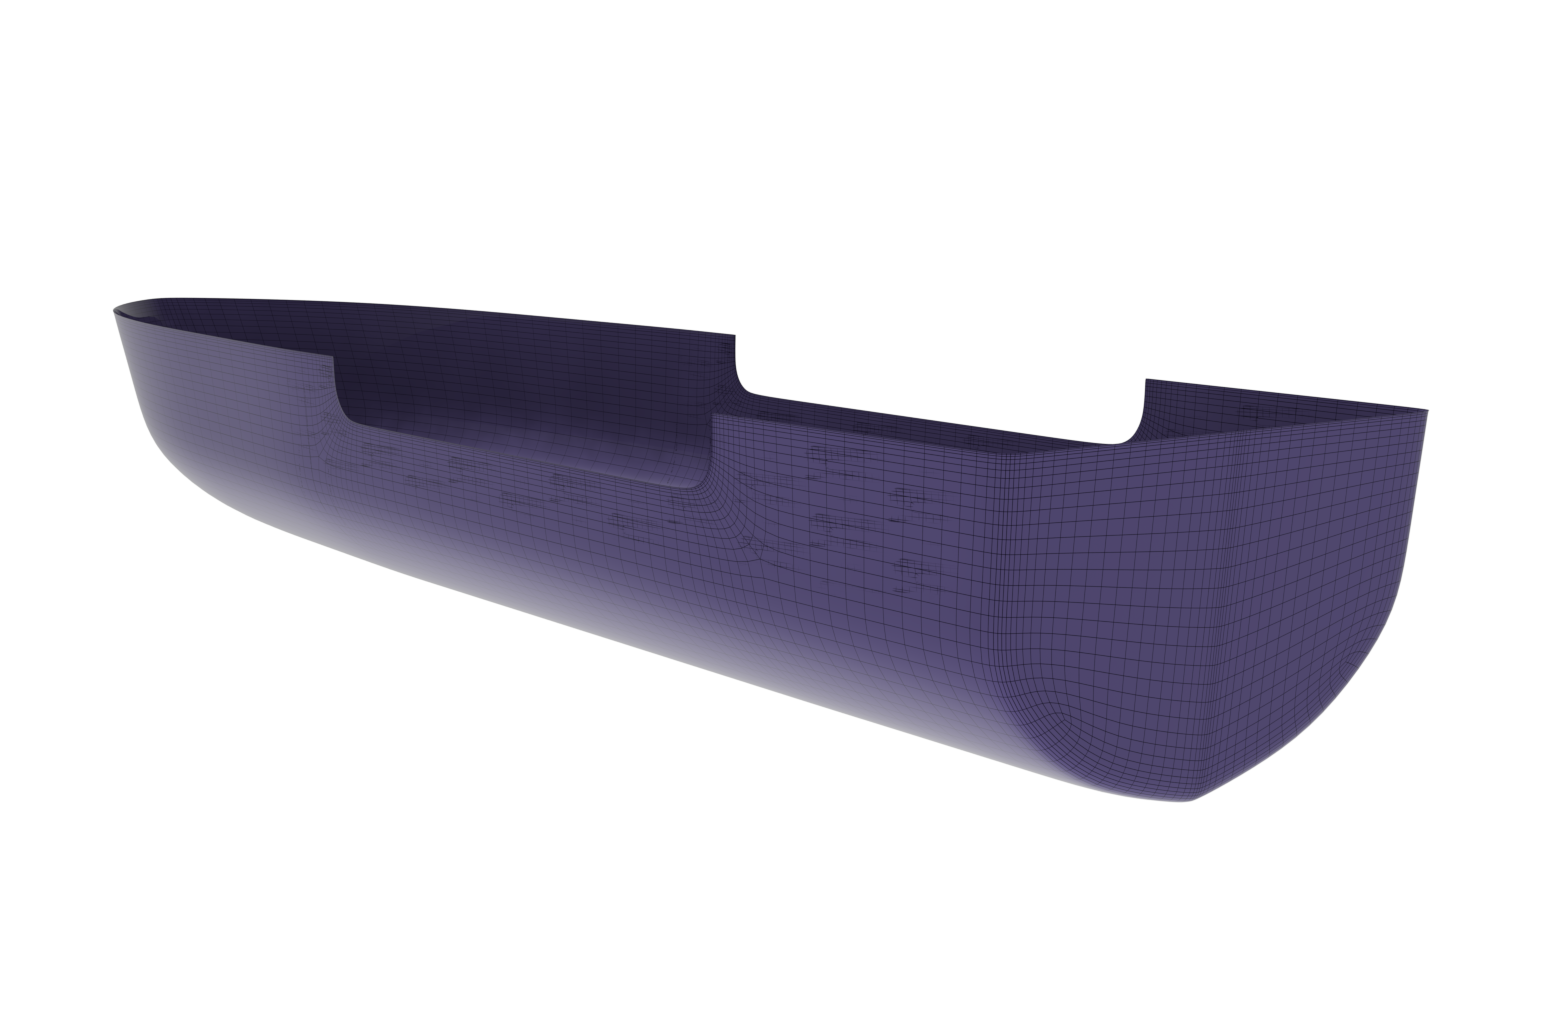
Once we have our plan, we can start building the actual 3D shape. Think of this base shape as a mold or a guide; everything we build later will be stretched and wrapped over this surface. To get the best results, we follow two main rules:
We build the shape with "seams" in mind (like the seams on a piece of clothing). This helps us know exactly where the different parts of the model will eventually split or bend.
We keep the detail level high at this stage. If the base shape is "chunky" or blocky, the final product will look jagged. If the base is smooth, the final product will look sleek and realistic.
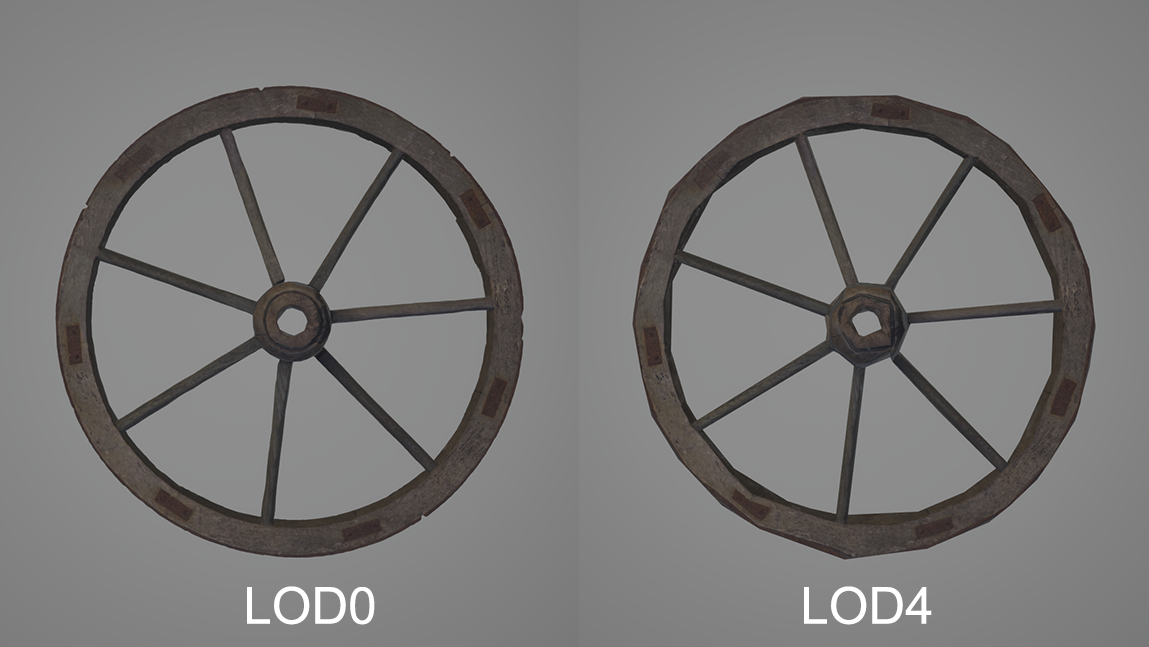
Think of a circle made of straight lines, like looking at the profile of a wheel. A wheel made of many small edges appears smooth, with real-world curves (LOD0). At low resolution with larger spans between the edges, it has flat spots and looks "faceted" or blocky (LOD4). By putting in the effort to make this mold smooth now, we ensure the final model looks high-quality and professional from every angle. Making the future steps far simpler and more successful.
Once the shape is ready, we create its UV map. Think of this like taking a 3D object and carefully "unwrapping" it so it lies perfectly flat on a table, like a clothing pattern or a flattened cardboard box. This flat map is the most important part of the process. To make sure the final result looks exactly as expected, we follow three golden rules:
No stretching (minimal distortion): We make sure the pattern isn't being pulled or warped. If you drew a perfect circle on the flat map, it should still look like a perfect circle when wrapped back onto the 3D boat or shirt.
Consistent sizing (uniform density): We keep the scale the same across the whole project. You wouldn't want the wood grain on the front of the boat to look giant while the grain on the back looks tiny.
Everything facing the same way (uniform directionality): We make sure all our UV islands are pointing in the same direction. It’s much easier to work when everything is lined up neatly, rather than having to juggle pieces that are upside down or sideways.
By taking the time to make a clean, organized "flat map", we ensure that any pattern we apply later – whether it’s wood planks or metal chainmail – fits the first time, free of any awkward seams or dodgy spots. Extra time at this stage is a solid investment, as it eliminates troubleshooting later and allows our efficiency to compound as the project scales.
At this point, we’ve finished the hard work of building the core structure. This master template is now universal, meaning we can use it to create almost anything without having to change the foundation.
Set it and forget it: We keep this base shape and its map exactly as they are. This ensures that every version we create afterwards stays consistent.
Agnostic building: Because the foundation is solid, it doesn't matter what "asset" we decide to use later. Whether we decide the boat should be made of mahogany planks or carbon fiber hexagons, the system we’ve built handles it all the same way.
Easy updates: If the client asks for a major change to the overall shape, there’s no need for a total rebuild. We simply update this one master base, and those changes can then flow through to every variation, keeping the project on track.
We’ve moved from "hand-building" to "mass-customization." We have a reliable, unchanging base that allows us to experiment with different looks and materials at speed. This is a middle ground between a manual and instance-based workflow.
Creating our blend shape setup
Phase 1: Clean up and scene housekeeping
We start by moving the model from the software it was created into Maya. Ensuring that when we import it into Maya, we maintain the original scale. Using the .FBX format is a good way to avoid any conversion issues. For good housekeeping, we want to make sure to set the model up before we perform any actions.
We "freeze" the imported pattern model to tell Maya: "This is the starting point." It’s like resetting a scale to zero before moving anything around.
Over time, 3D software keeps a "receipt" of every single click and change. This can make the file heavy and prone to crashing, or introduce unforeseen bugs. We wipe this history to avoid this.
Centre the pivot to make sure the object's "anchor point" is in the right location. It’s much easier to rotate or move a wheel if the axle is in the center rather than off to the side!
If you are not familiar with Maya, this could seem like a learning step; it’s actually very easy. In the poly modeling tab, we have a set of "One-Click" buttons that handle all of this housekeeping instantly.

Phase 2: Setting up the script command center
We want to keep a few control windows open while we work. Think of these as our command center – they give us all the controls we need and provide a look at what Maya is doing in the background. This allows us to make adjustments on the fly and to control our blend shape. They’re also our early warning system; by watching the live data in these windows, we can spot small errors immediately. It’s much easier to fix a tiny glitch when it happens than to try to find it later when it's buried under hours of work.
We want to open up the shape editor (this is where we control our blendshapes) and the script editor (where we run our script and get real-time diagnostics).
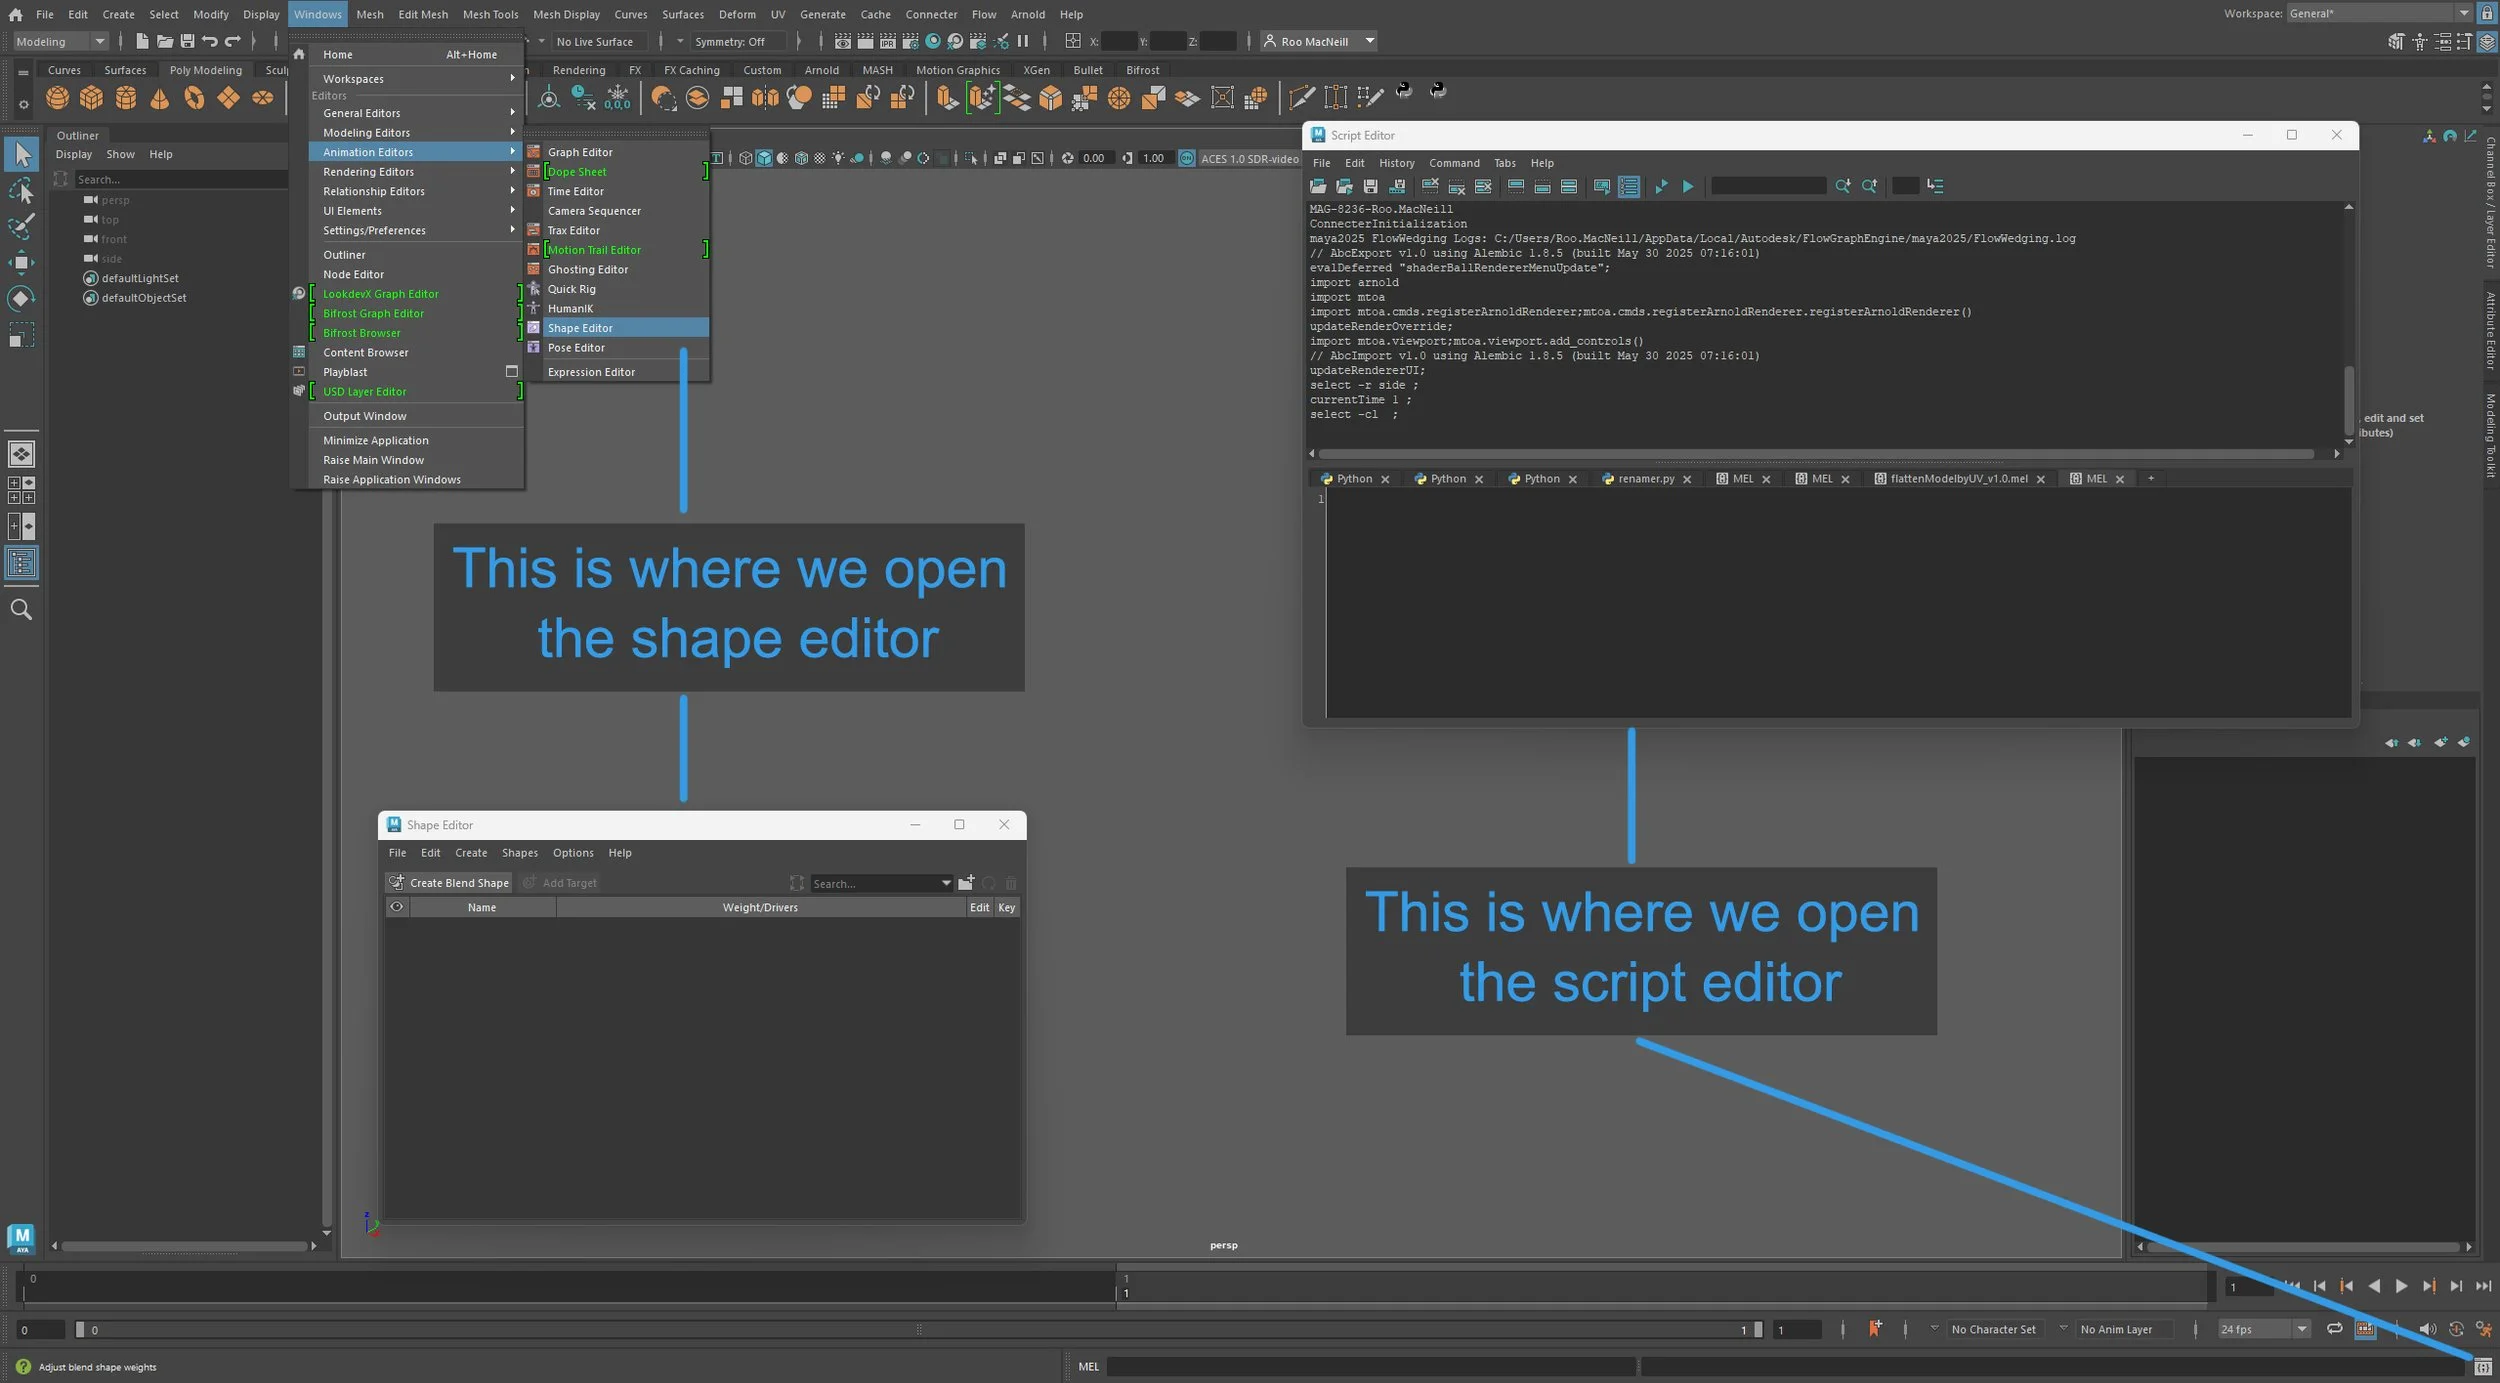
With these open and our model in Maya, we are almost ready to go with the creation of our flattened UV blendshape. All we need to do now is open the flattened UV script (linked at the bottom of the page) into a MEL (Maya Embedded Language) tab within the script editor. This can be done by hitting the + icon and selecting the MEL option to give us a clean workspace.
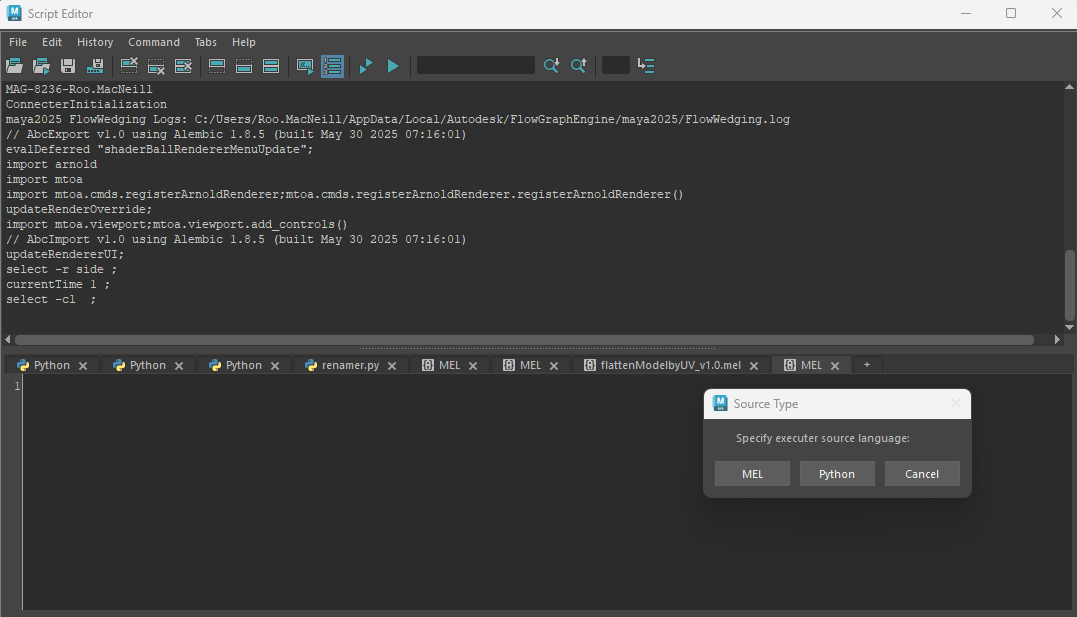
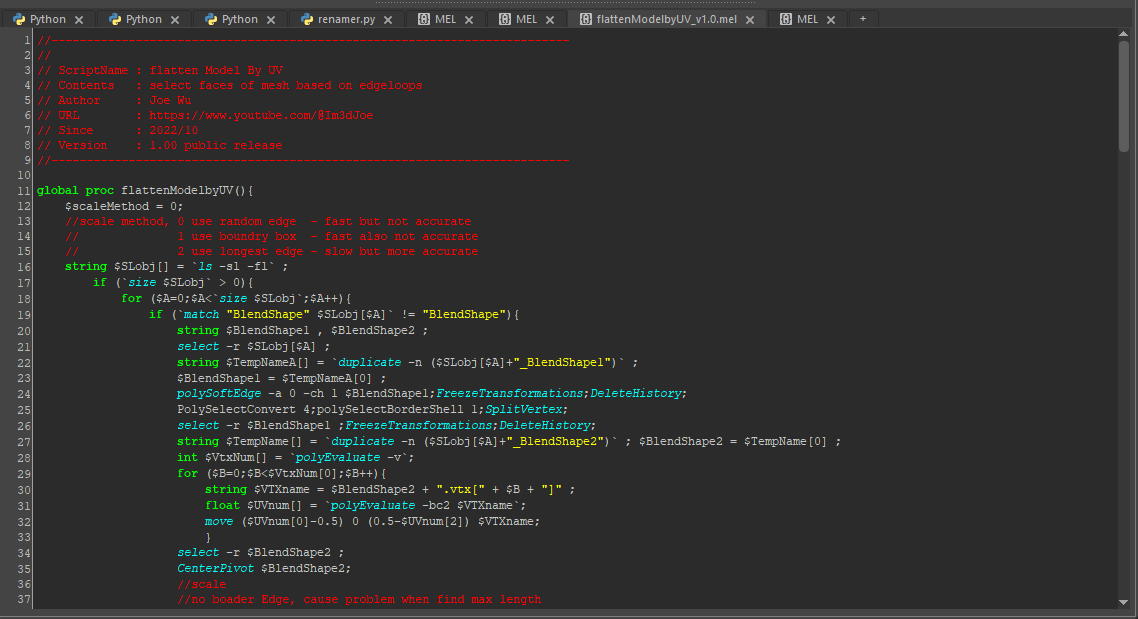
Next, navigate to the File menu at the top left of the script window and open your script file. You will know it has loaded successfully when the MEL window is no longer empty, but instead displays the script instructions.
Phase 3: Generating the flattened blendshape
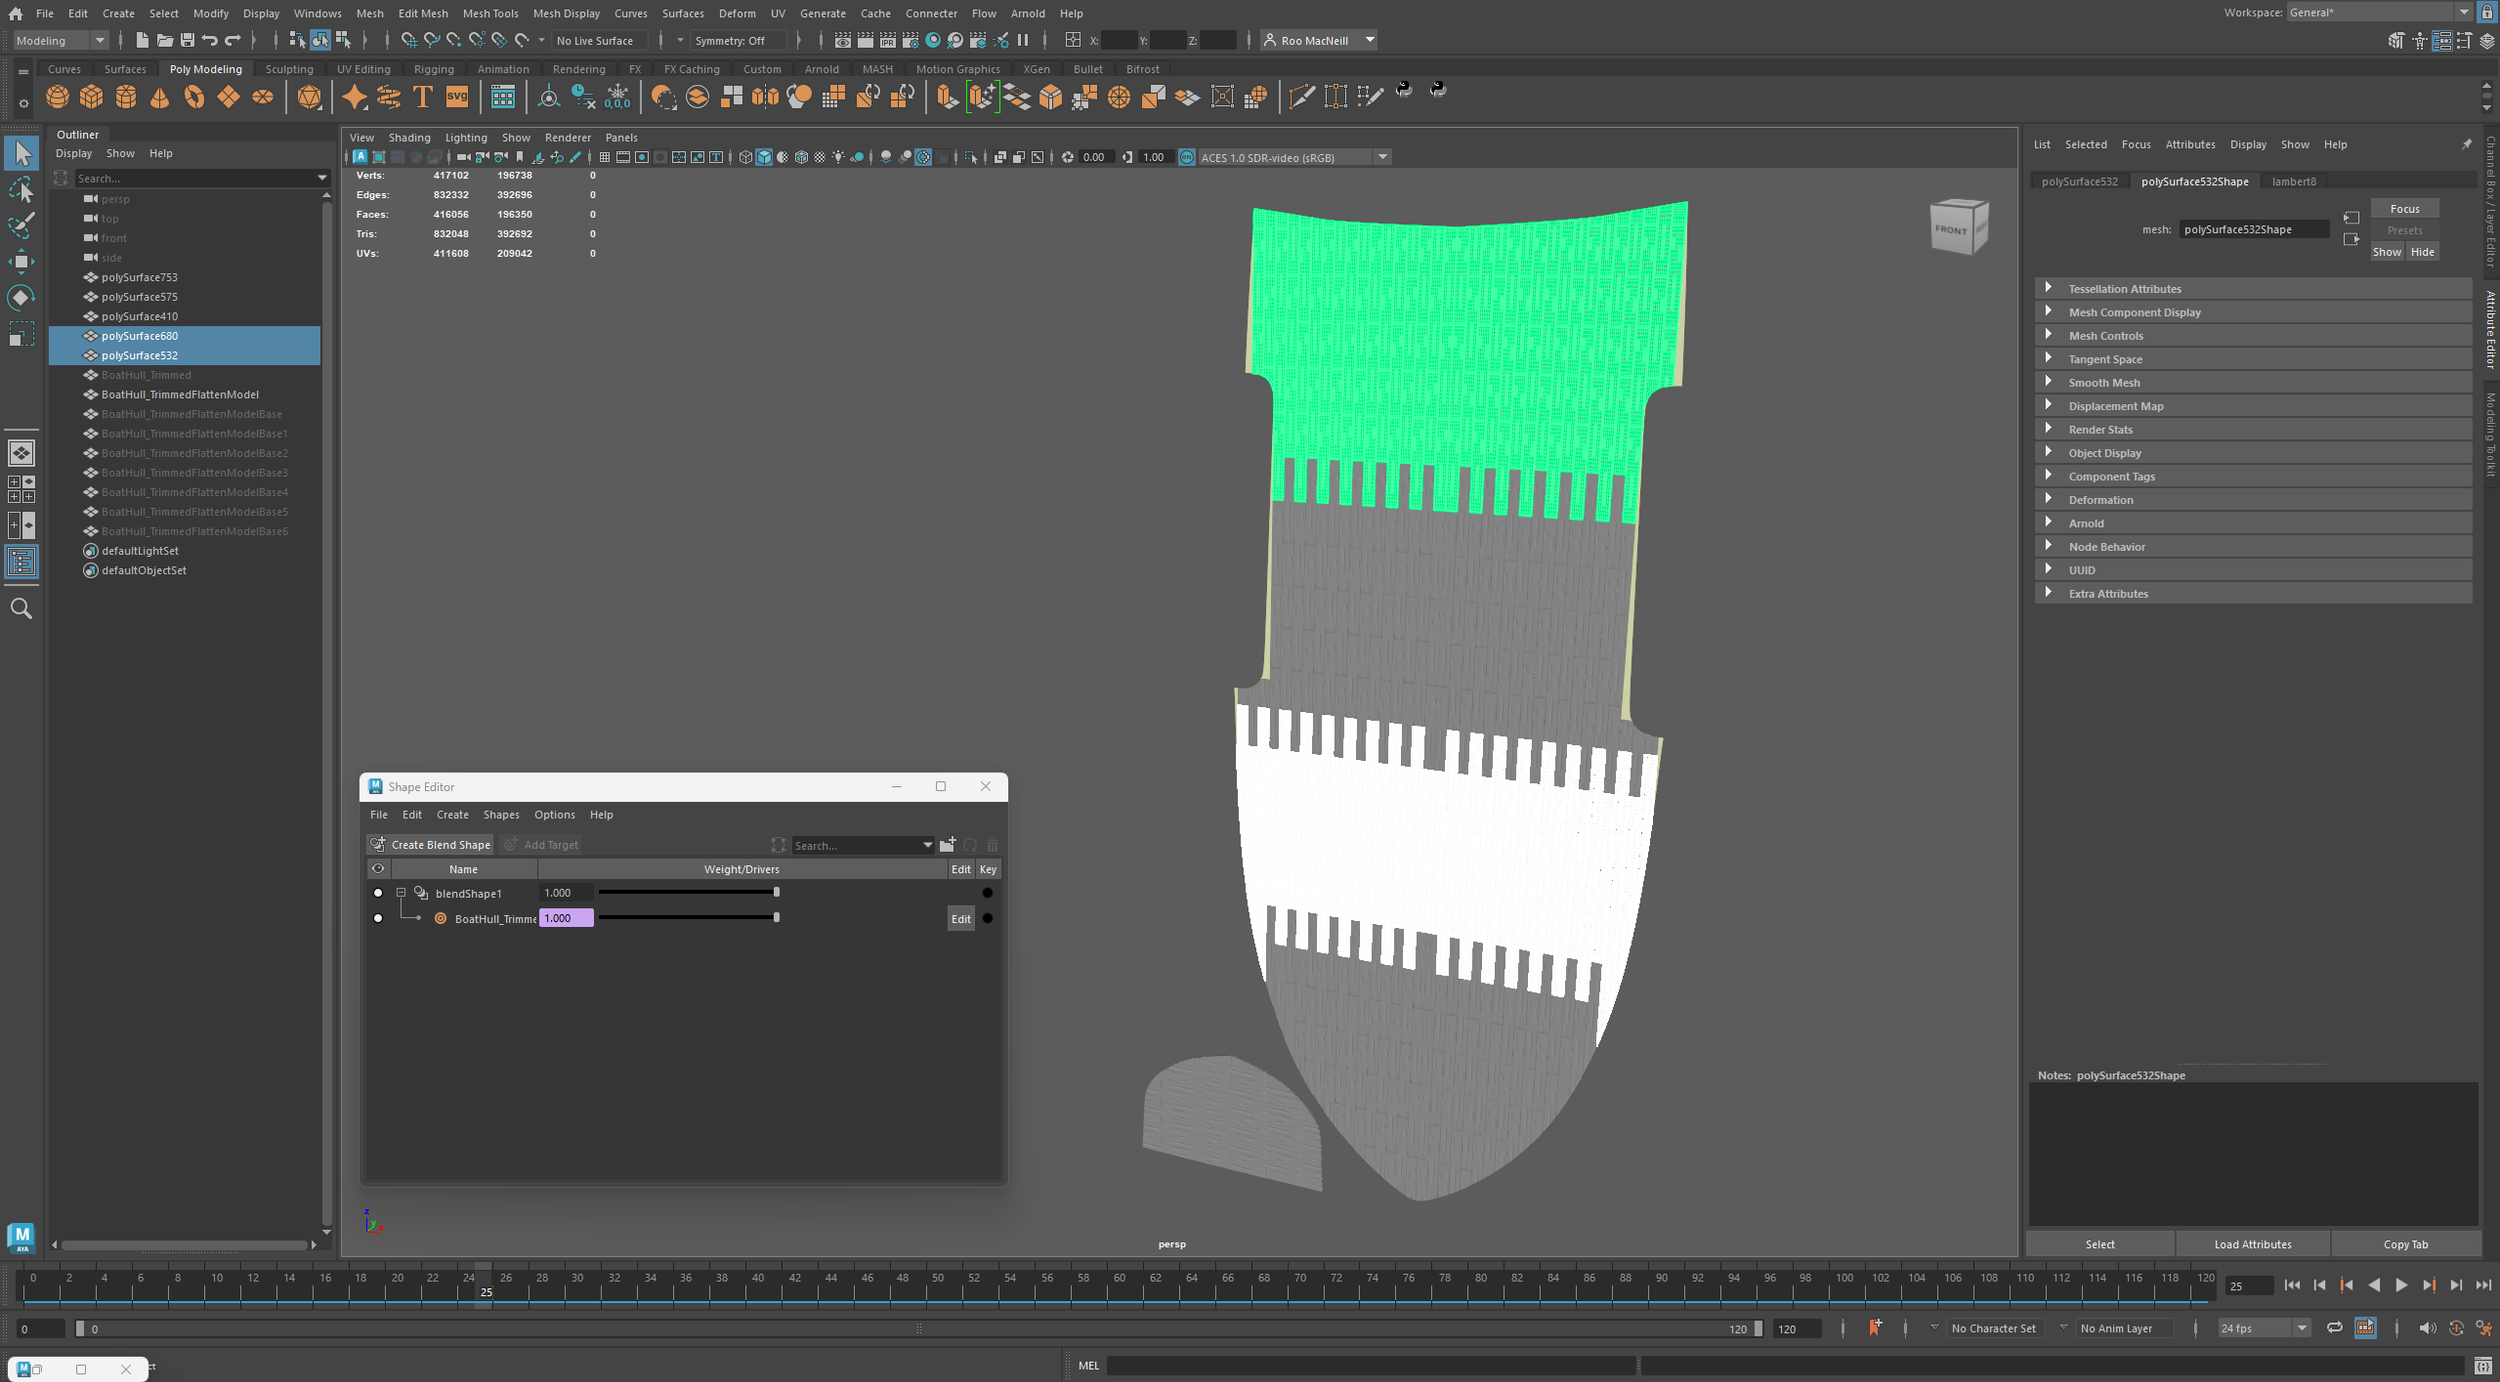
Now it starts to get fun! With our model selected, click on the text body within the MEL script and hit CTRL+Enter. This will run the script.
If we find ourselves doing this a lot, we can turn this command into a single button on our toolbar. I personally prefer to keep the script window open while it runs; it serves as a "diagnostic screen" that shows exactly what Maya is doing, making it easy to verify the process. To test if it has worked, check the Shape Editor – you should see a new blendshape with a slider. Moving this slider will transition the model between its various states.
Now that our blend is ready, we need to extract a flat version to work on. We must use the exact same model we have just flattened so that the size and shape match up perfectly later.
We move the slider that "unrolls" the 3D model until it is 100% flat and presents in the same form as the UV map. Hit a shortcut (Ctrl+D) to make a duplicate; this allows us to work on the copy while the original blend stays safe and untouched. Clear the history, etc., of the duplicate, the same as we did above. This makes it a clean, simple sheet that is ready for us to start designing on. Then export the flat sheet and get to work on our pattern.
By using the same mesh for the flat version, we don't have to worry about things not lining up later. It ensures that whatever we draw on the "flat" version will wrap around the 3D version perfectly, with zero guesswork.
Pattern creation
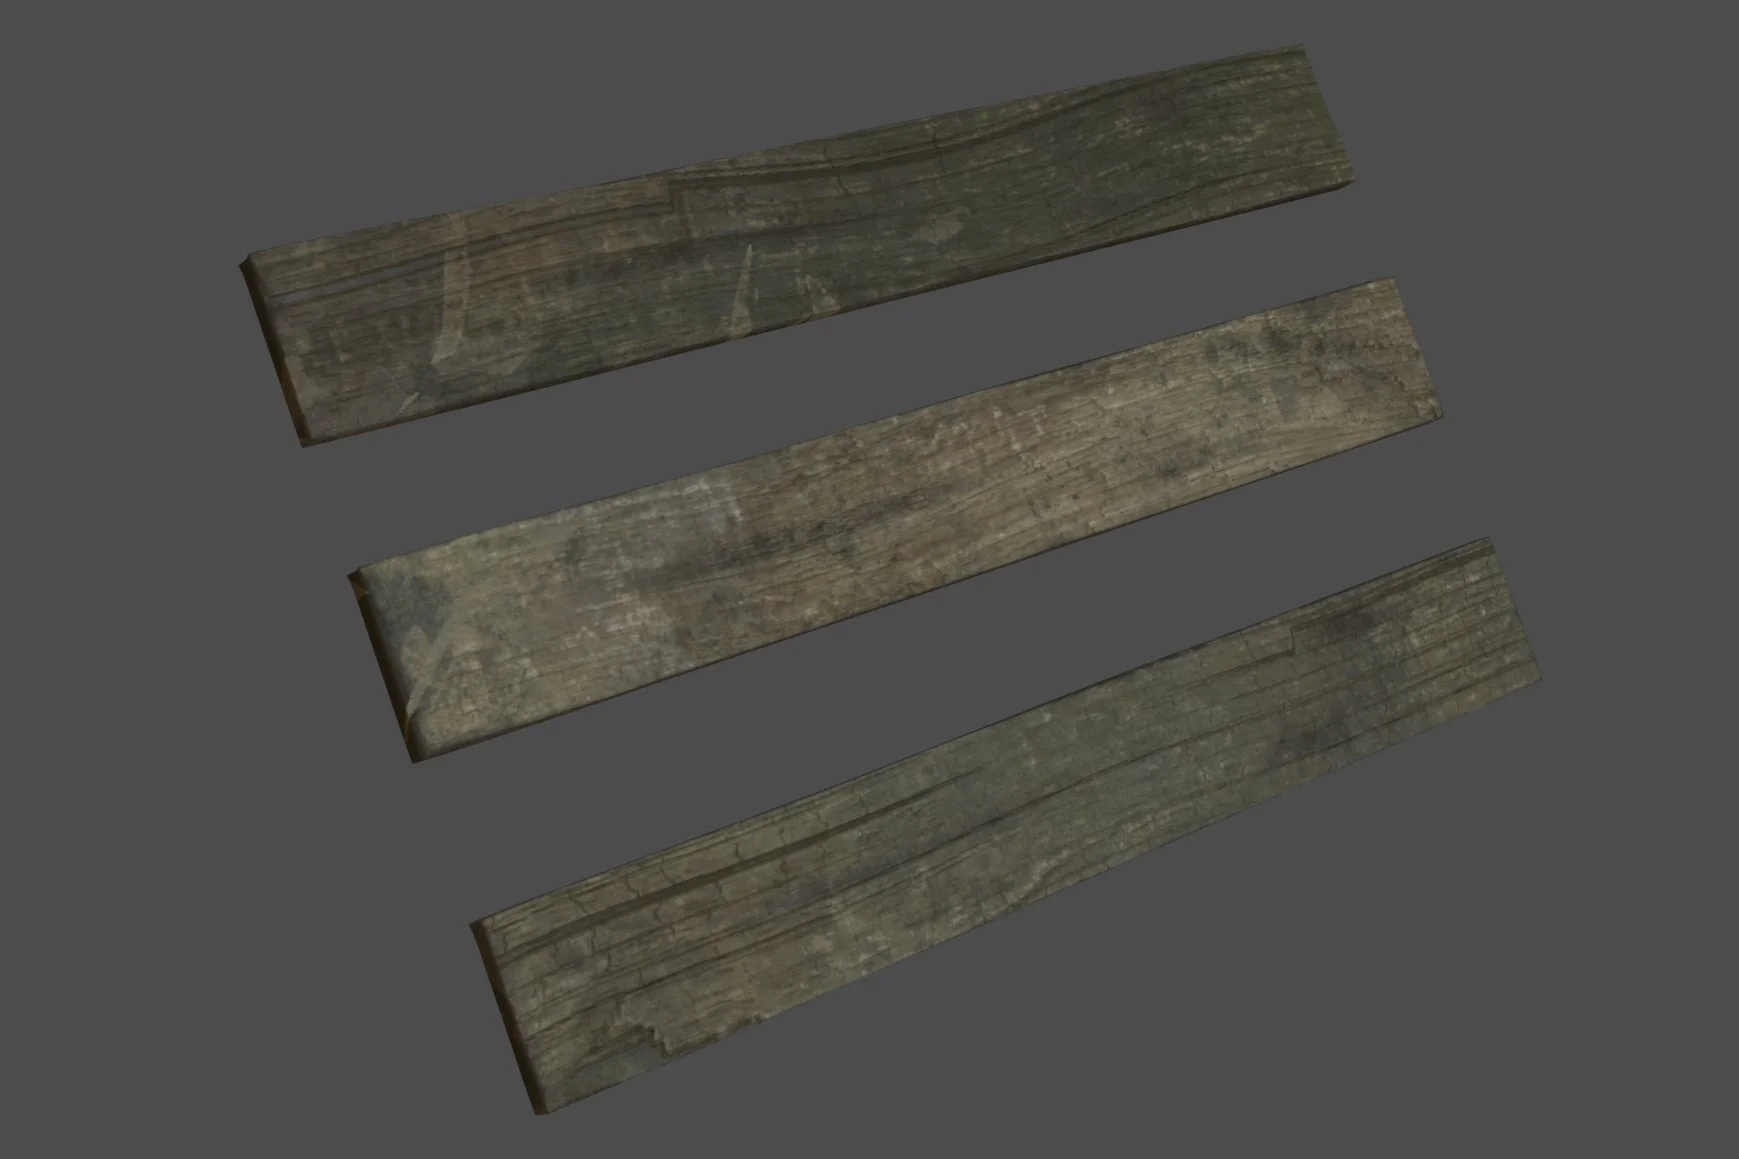
Back in our DCC (Digital Content Creation) tool of choice, it's time to integrate the specific assets required for the final build. For this example, we’ll use three bespoke wooden planks, provided by the client. By treating these as “existing IP”, it forces us to maintain a recognizable brand identity. A plank is a very simple example, but it makes it easy to visualise the process and start to understand how powerful this workflow can be.
In a traditional approach, this is where we would start playing with deformers or jiggling around verts to shape and form the board, which needs to be done one by one. Working with the assets using these techniques can distort the existing UVs and, most importantly, mean that if we need to swap the plank out later in production, we’d have to start from scratch.
Building onto the flat canvas
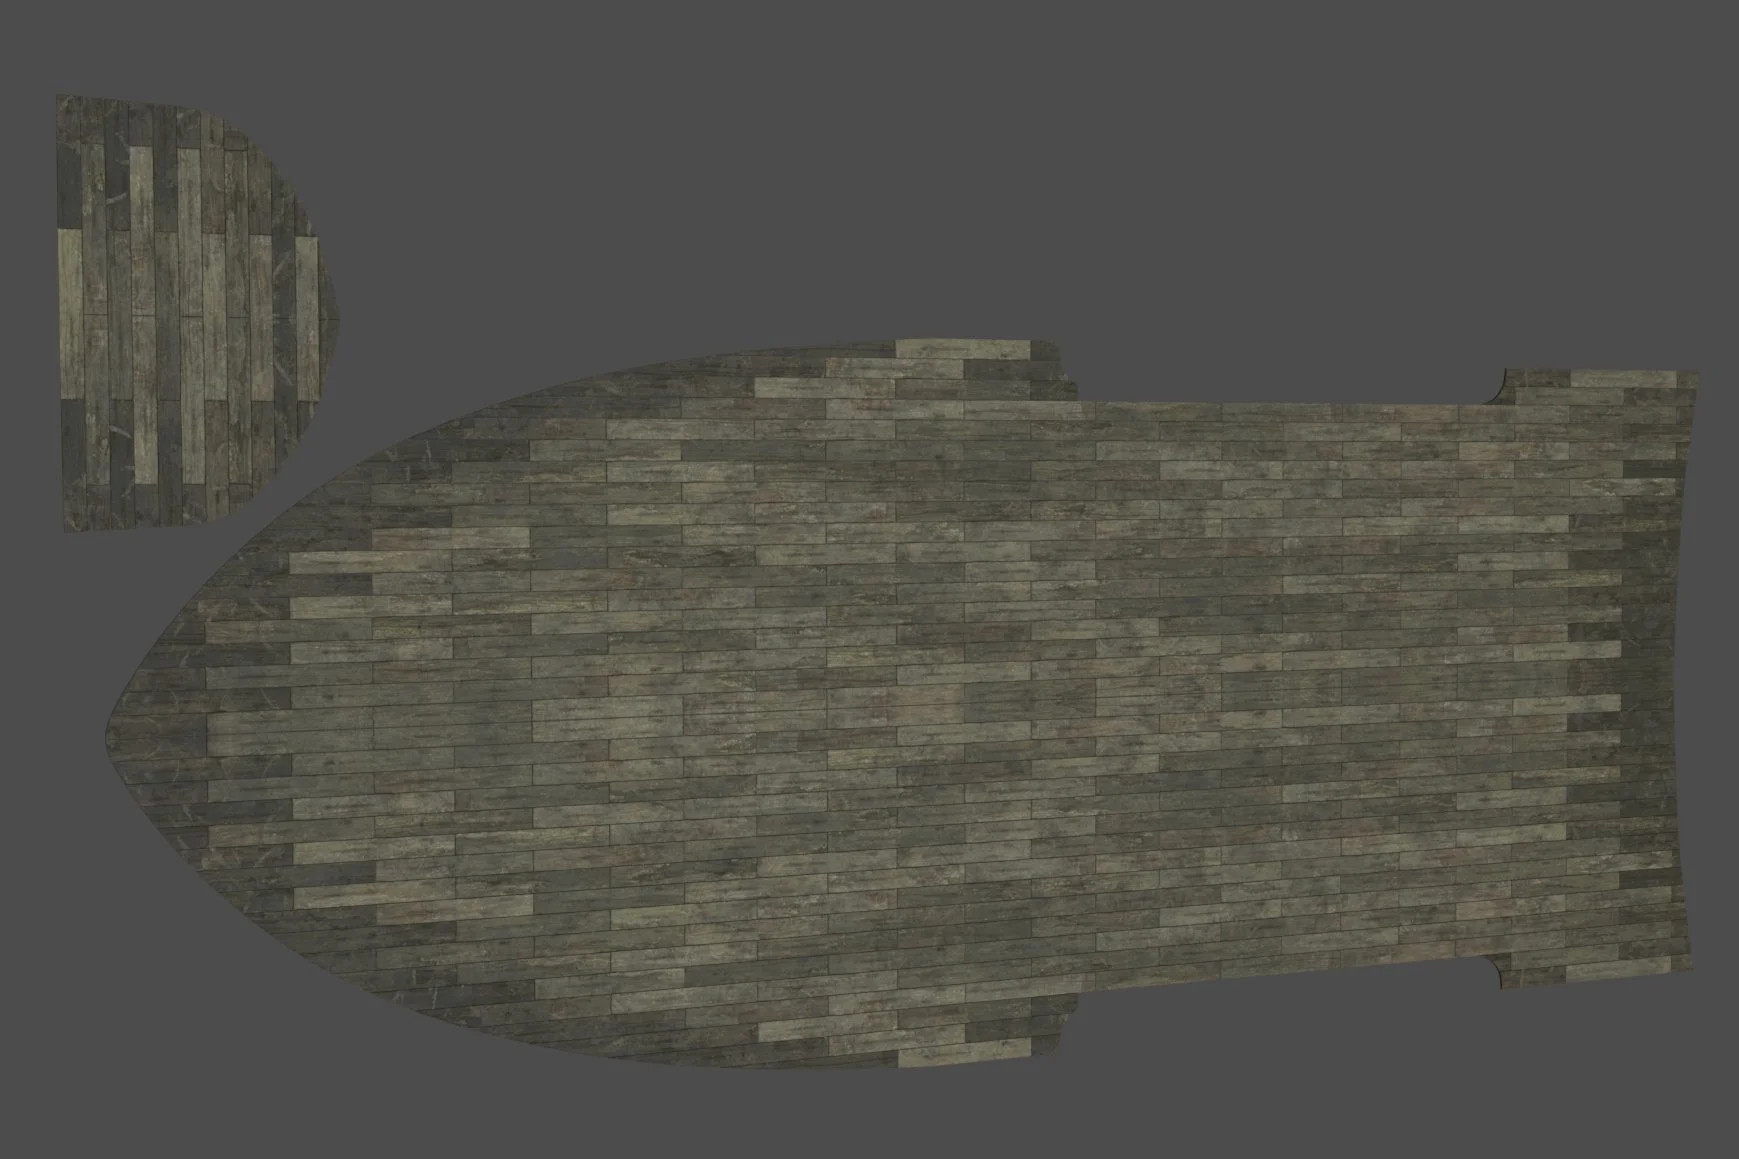
Instead, what we’re going to do is take our flat canvas (the flattened UV mesh) and start placing our building blocks, like wooden planks, exactly where we want them to go.
We look at our reference photos (for example, a real boat) to see how the wood was originally laid out during construction so we can mimic that layout. We need to make all our planks stay within the boundaries of our flat map. This ensures that when we blend the model back into a 3D boat, the seams line up perfectly and nothing looks broken.
Occasionally, a plank might land on a tricky corner or a sharp curve. In those cases, we might do a little bit of "hand-trimming" to make sure that specific piece fits perfectly. It's important to note that, for those outliers, some manual UV and texture work will be needed based on the edits to the mesh.
We will lose a little of the base element, but with this approach, we are keeping 95%+ of the original rather than a full rework. Even though there is still a bit of manual "hand-fitting" involved, this method is a massive shortcut. We are preserving the original information rather than rebuilding from scratch.
This then gets us to a stage where we can review the layout, get notes, spot errors and plan around the build before we have even got the planks into their final form.
Now that we have all our pieces laid out, the planks are arranged, and the layout is approved – it’s time for the final magic trick. We’re going to glue our new detailed pattern to our blendshape so it can take the shape of the boat. This example only uses three meshes and texture sets, so there is some repetition; this would be avoided with variations and tweaks.
To see how the process works, you can run a very simple test using your blendshape model and any primitive mesh.
Phase 4: The final wrap and diagnostic check
We start by bringing our pattern back into our Maya workspace (clearing history, etc.). Because we were so careful with our scale earlier, the new pattern drops exactly on top of our flat guide, like a perfectly placed sticker. We did all the heavy lifting on a flat surface; we don't have to struggle with "sculpting" every individual plank into a curve.
In the Maya scene, we’ll use the Wrap deformer to ensure the pattern moves synchronously with the blend shape model. This uses a volume falloff to handle complex 3D shapes, rather than only a flat object.
Select the pattern, then shift + select the flat blend shape model.
Navigate to the Deform dropdown.
Find the Wrap deformer
Click the Option Box before it runs.

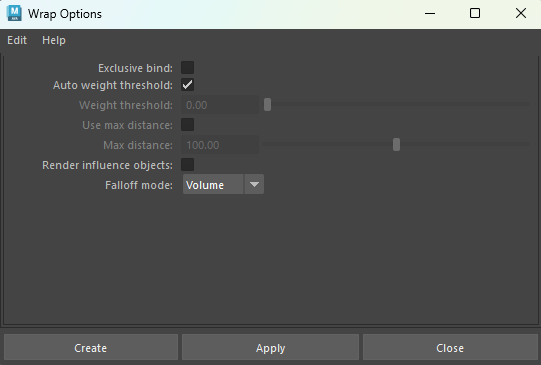
This opens the Wrap Options menu, where you configure the tool's behavior and how it interacts with the model. Generally, Auto weight threshold and Volume for the falloff mode will work. These will yield the correct result approximately 90% of the time. If the setup is incorrect, don't worry – these settings can be adjusted even after the tool has finished running and dialed in on a per-mesh basis.
This is where the Script Editor we opened earlier becomes our best friend. Occasionally, the process might seem like it’s stuck, and without that window open, we’d have no idea why. The tool we use to wrap the pattern has a built-in memory limit, and it’s not always clear where that limit is.
If we try to wrap a complex or dense pattern, the tool might run out of memory. Instead of just failing silently, it sends a warning to our Script Editor saying it has run out of memory. Without the Editor open, the tool would appear to have done nothing, and we’d be left guessing. With it, we can see the exact error message and know exactly how to fix the layout to fit within the tool's limits.
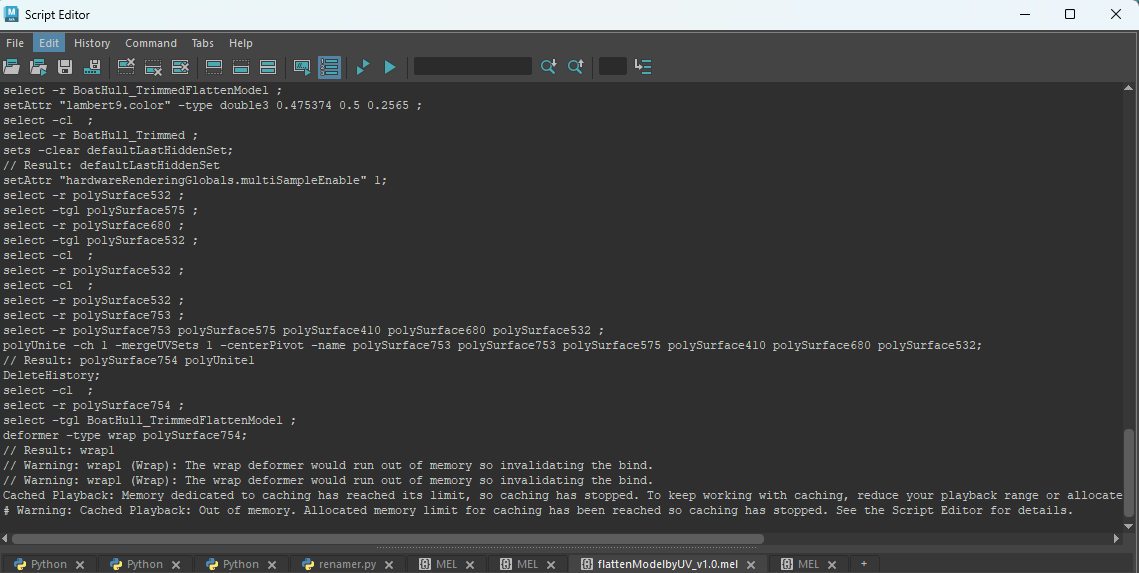
If we hit this limit, we simply break the pattern into slightly smaller, more manageable chunks. The end result is exactly the same, but the tool can handle it much more easily.
Now we have our model wrapped fully to the blend shape, so when we move the slider, the blend will move, and the wrapped model will follow – maintaining its volume and all of the details we built into it. If the manual fixes haven't already been done to the modified edges, we can easily see now where they exist and perform the work as needed (ideally on the flattened version to avoid reworks).
There can be a bug at times where putting the slider to 0 causes the pattern to break free; setting it to 0.001 will fix this.
At this point, you have your mesh in its final wrapped form; it can be exported and brought into production. You can also create multiple versions of the base pattern with alternating planks or layouts, repeat the wrap, and you now have multiple versions of the boat ready to go in no time.
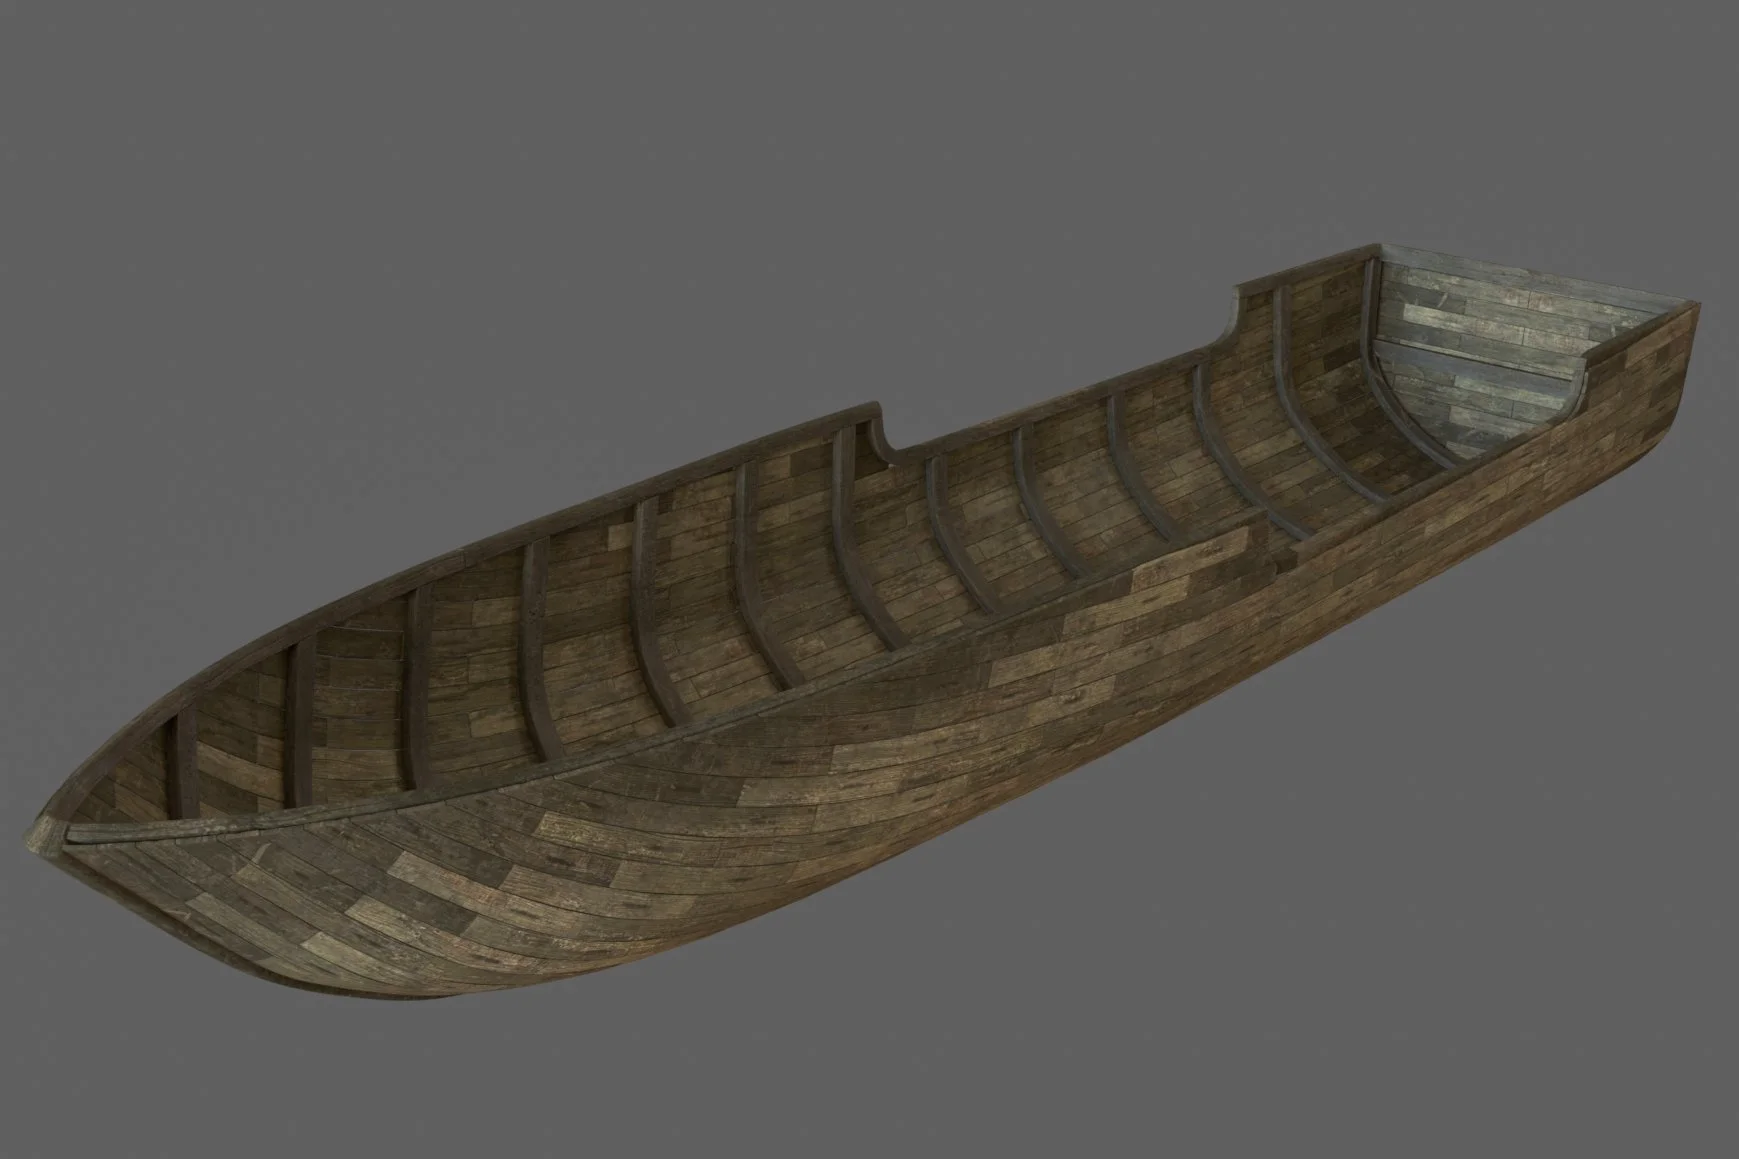
Once we have our system set up, we can use it to add more than just the "skin" of the boat. We can use the exact same process to build the internal structure, like the ribbing or the frame.
By simply nudging our pattern slightly up or down on the flat map, we can instruct whether those wooden beams should sit on the inside or the outside of the boat's shape. We don't need to build a new system for the interior. We use the same blendshape and simply swap the outer planks for inner ribs. It’s like using the same cookie cutter to make both the cookie and the icing – everything is guaranteed to fit together perfectly.
This layering technique allows us to build incredibly detailed, realistic models – inside and out – without the risk of parts overlapping or gaps appearing where they shouldn't. It keeps the construction clean, organized, and fast.
Yes, it takes a moment to set up this base blend shape, but once it’s ready, we can fly through client requests. More importantly, it allows us to do things that standard painted-on textures simply can't handle.
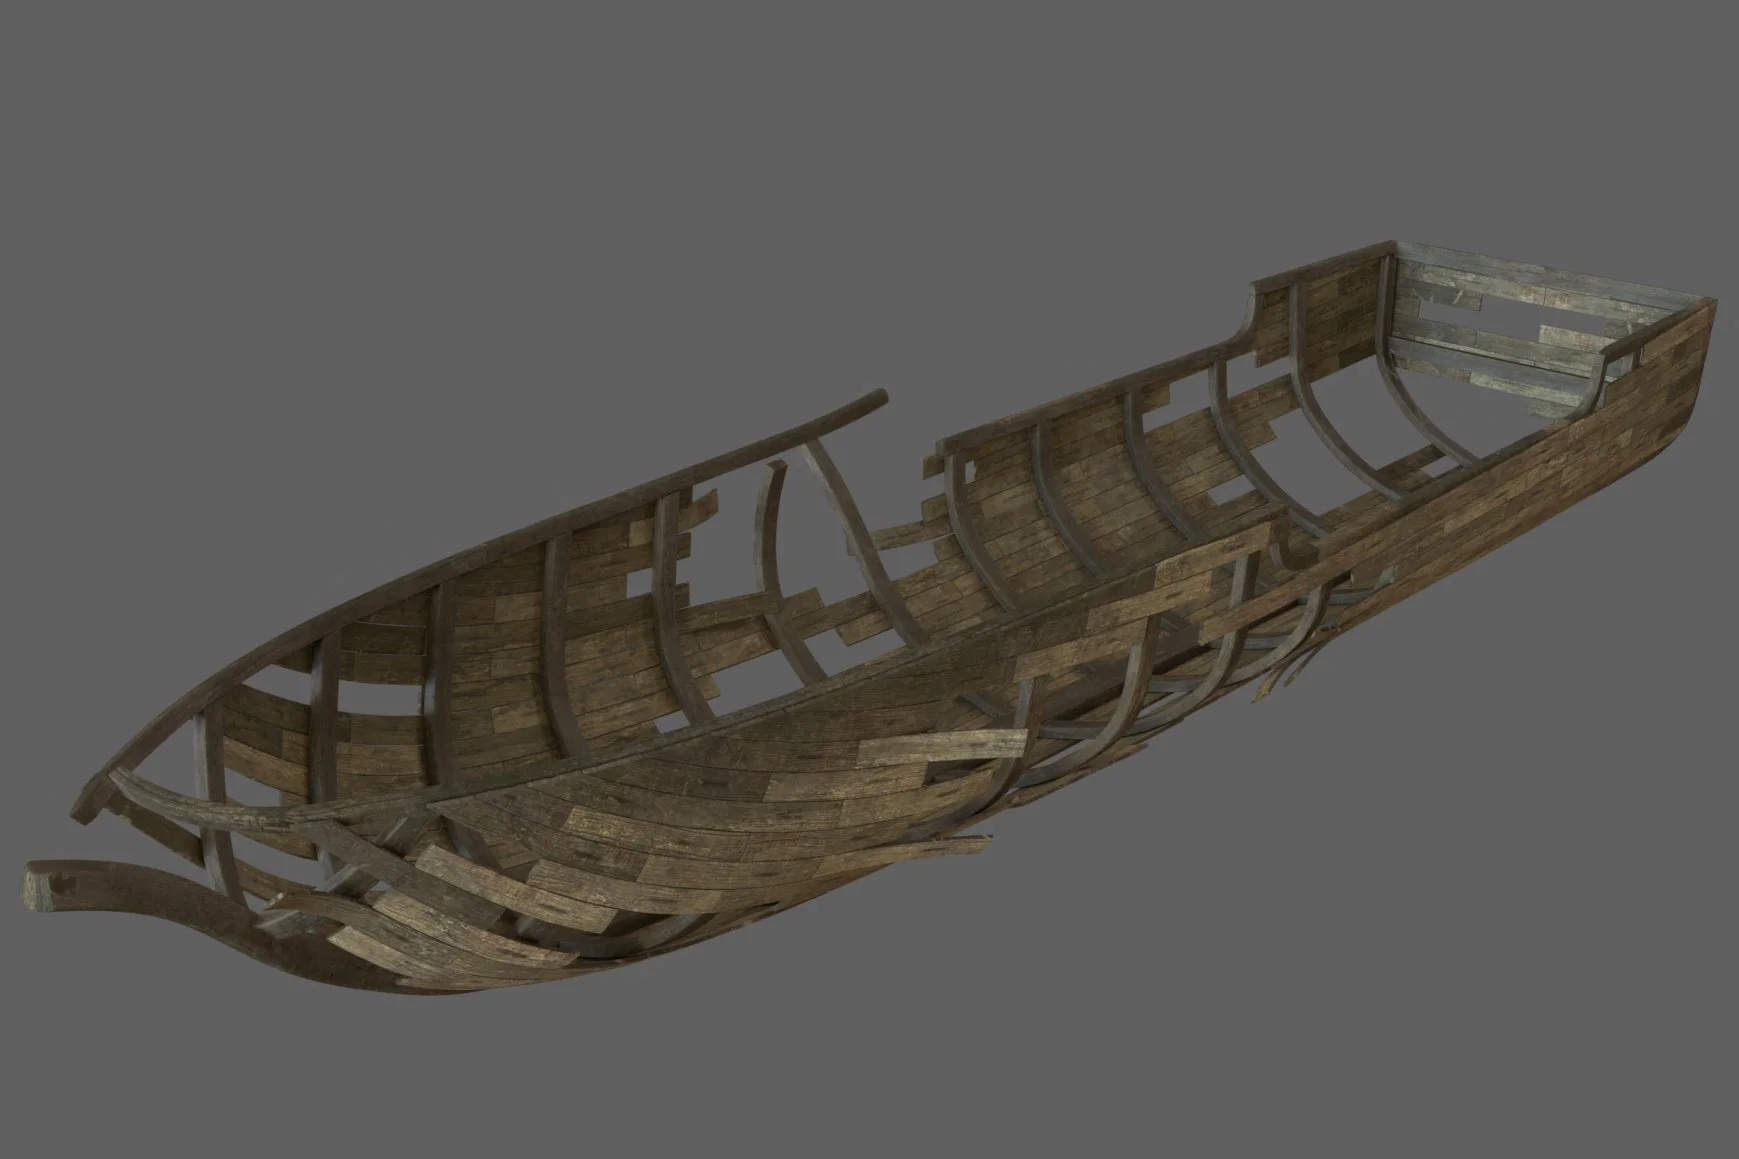
Because our planks are actual 3D objects and not just images, we can easily create a wrecked version of the boat. We can pull planks off, create realistic gaps, or show splintered wood for a specific scene. We can bend individual boards or warp the wood to make it look weathered and old. If a client says, "Make the boat look like it crashed into a reef," we don't have to rebuild everything. We just tweak the existing 3D planks.
Considering a real-world application, this method's true benefit emerges with scale. While it might seem excessive for modeling a single boat, this approach significantly accelerates the workflow, particularly when handling feedback and revisions. For an example of speed, the creation of the above boat, including the creation of the base assets (SubD modelling and UV unwraps), texturing and creating the distressed version, took just under a day and a half of work.
Proven at scale
The UV blendshape modeling methods used for this blog are exemplified in the Eyes of Wakanda series. This approach was utilized to create all the ships and the hero asset, the Trojan Horse, featured in the show. By employing a base library of assets, it was possible to achieve a final quality result, populate many builds, allow for a huge variety of ships, and facilitate fast-paced turnaround on feedback.
More advanced use cases
We've explored a straightforward application of the toolset, resulting in a logical outcome. Since using its capabilities to place planks on a boat is quite basic, we will now examine more complex implementations to discover more innovative build approaches.
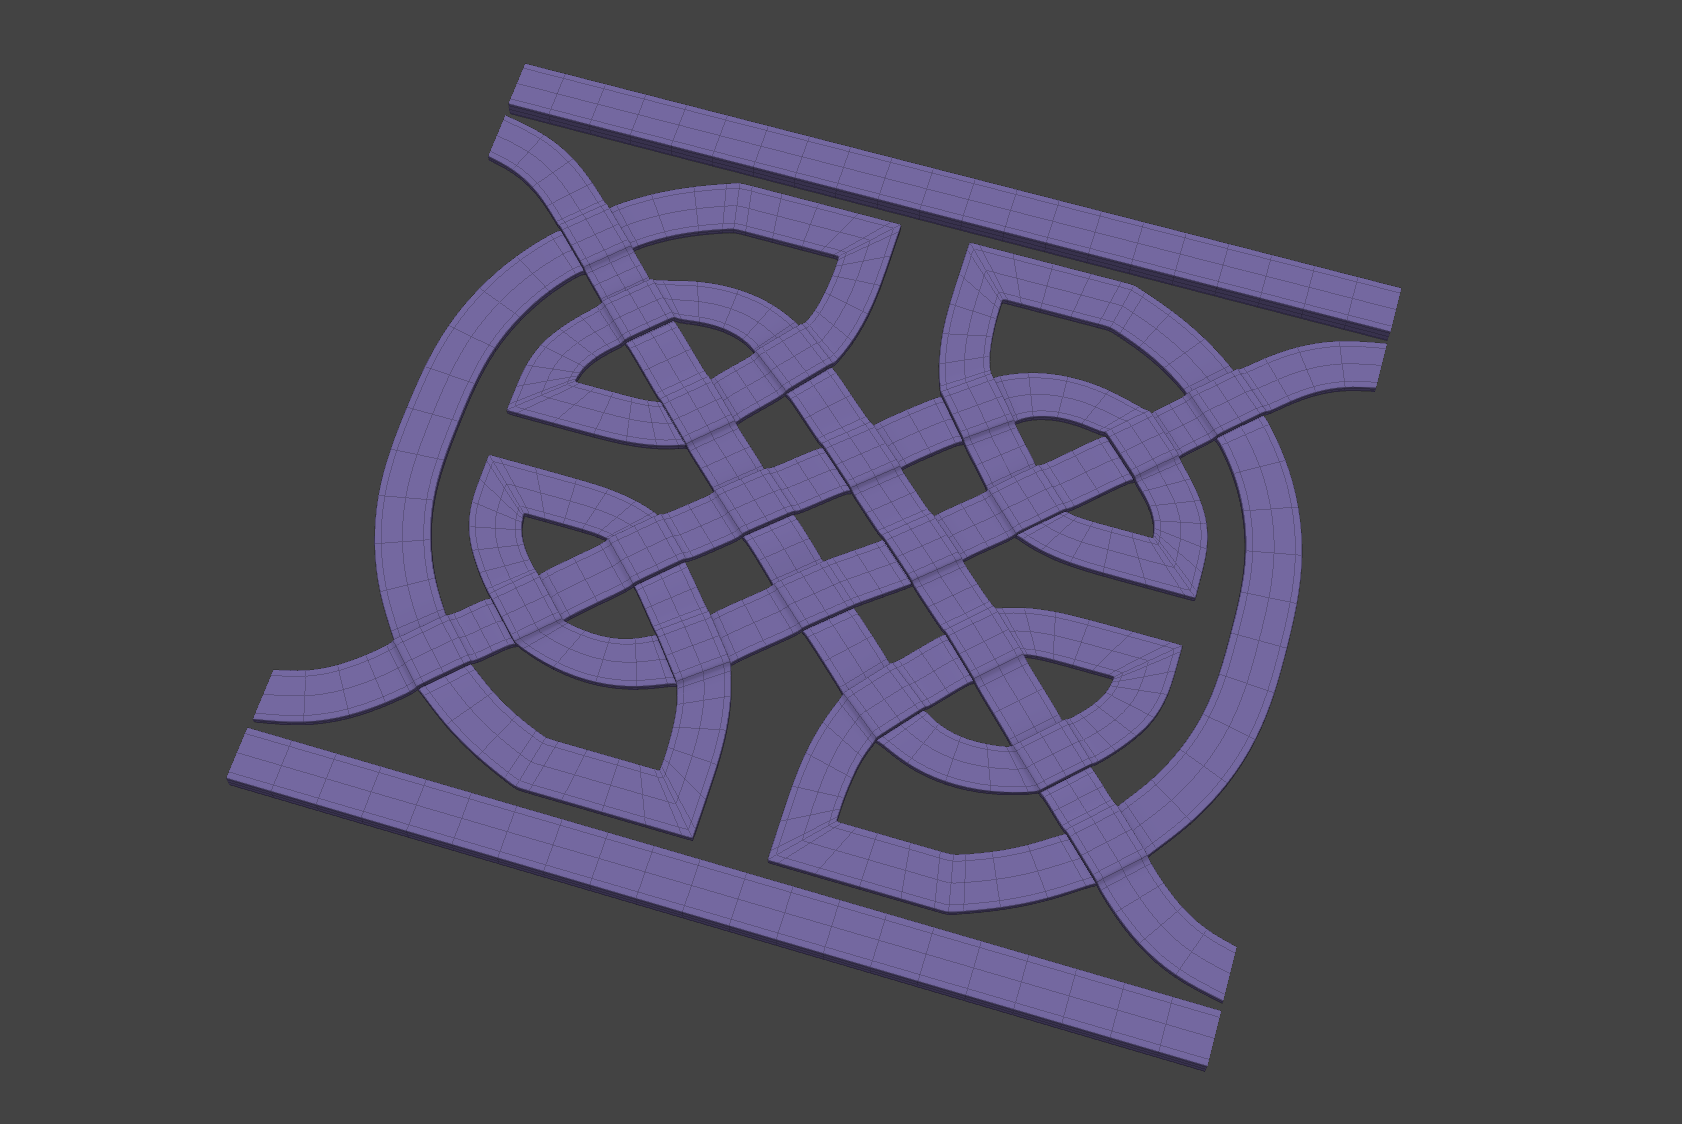
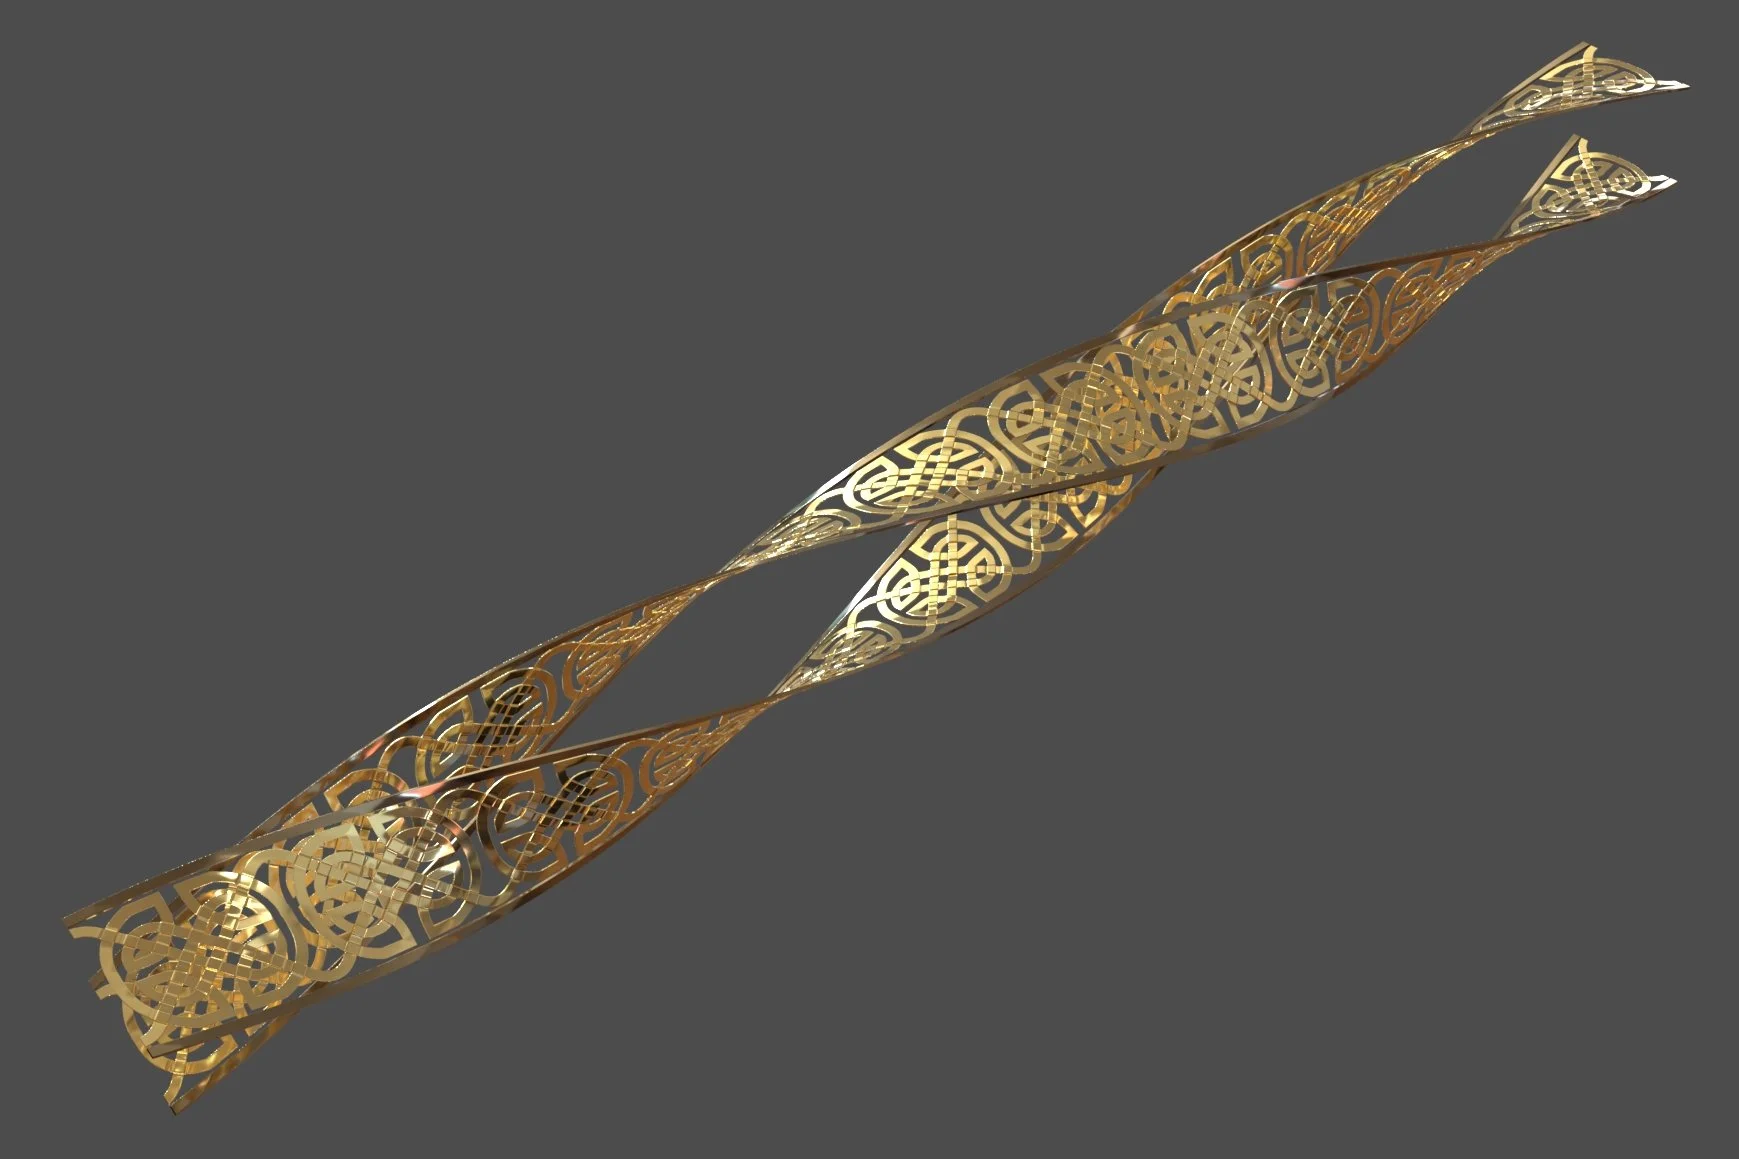
Let's say we have a client who has delivered us a tileable Celtic knotwork pattern, which was designed in-house by them and cannot be changed in look, topology or vertex order.
We have a very short turnaround to apply this pattern to a helical spiral without distorting it. This could be done with a twist deformer, but when the same client then asks us to apply the pattern to buildings, shields, walls or any other multitude of shapes, the twist is no longer enough. Following the same steps, we can quickly deliver.
For another real-world example, this technique was used to create the tiling and intricate detailing on the buildings created for Asgard in the Thor: Ragnarok film, showcasing how powerful this approach to creation can be.
Final use case examples
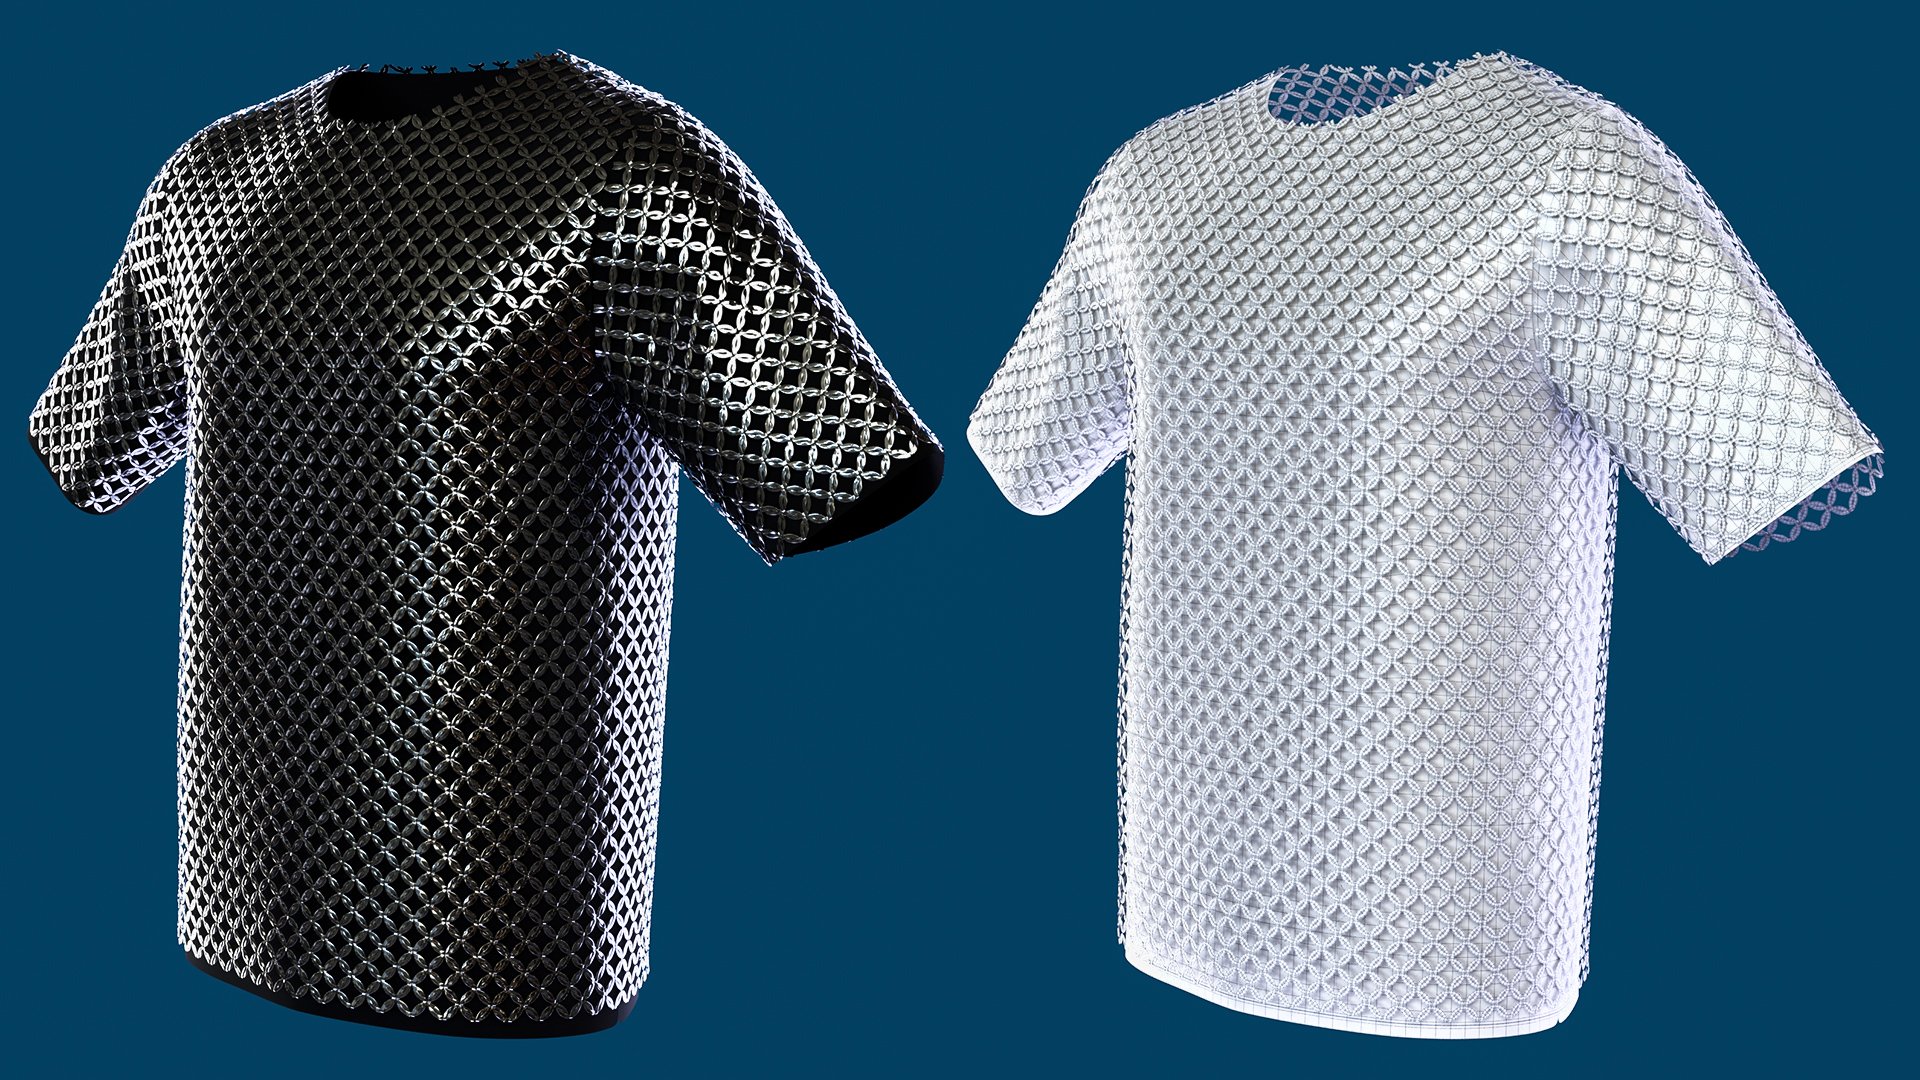
This technique is a massive timesaver when working with simulated clothing (like a shirt that ripples and folds naturally). It allows us to take a "finished" piece of clothing and completely change what it's made of, while keeping all the realistic folds and movement intact.
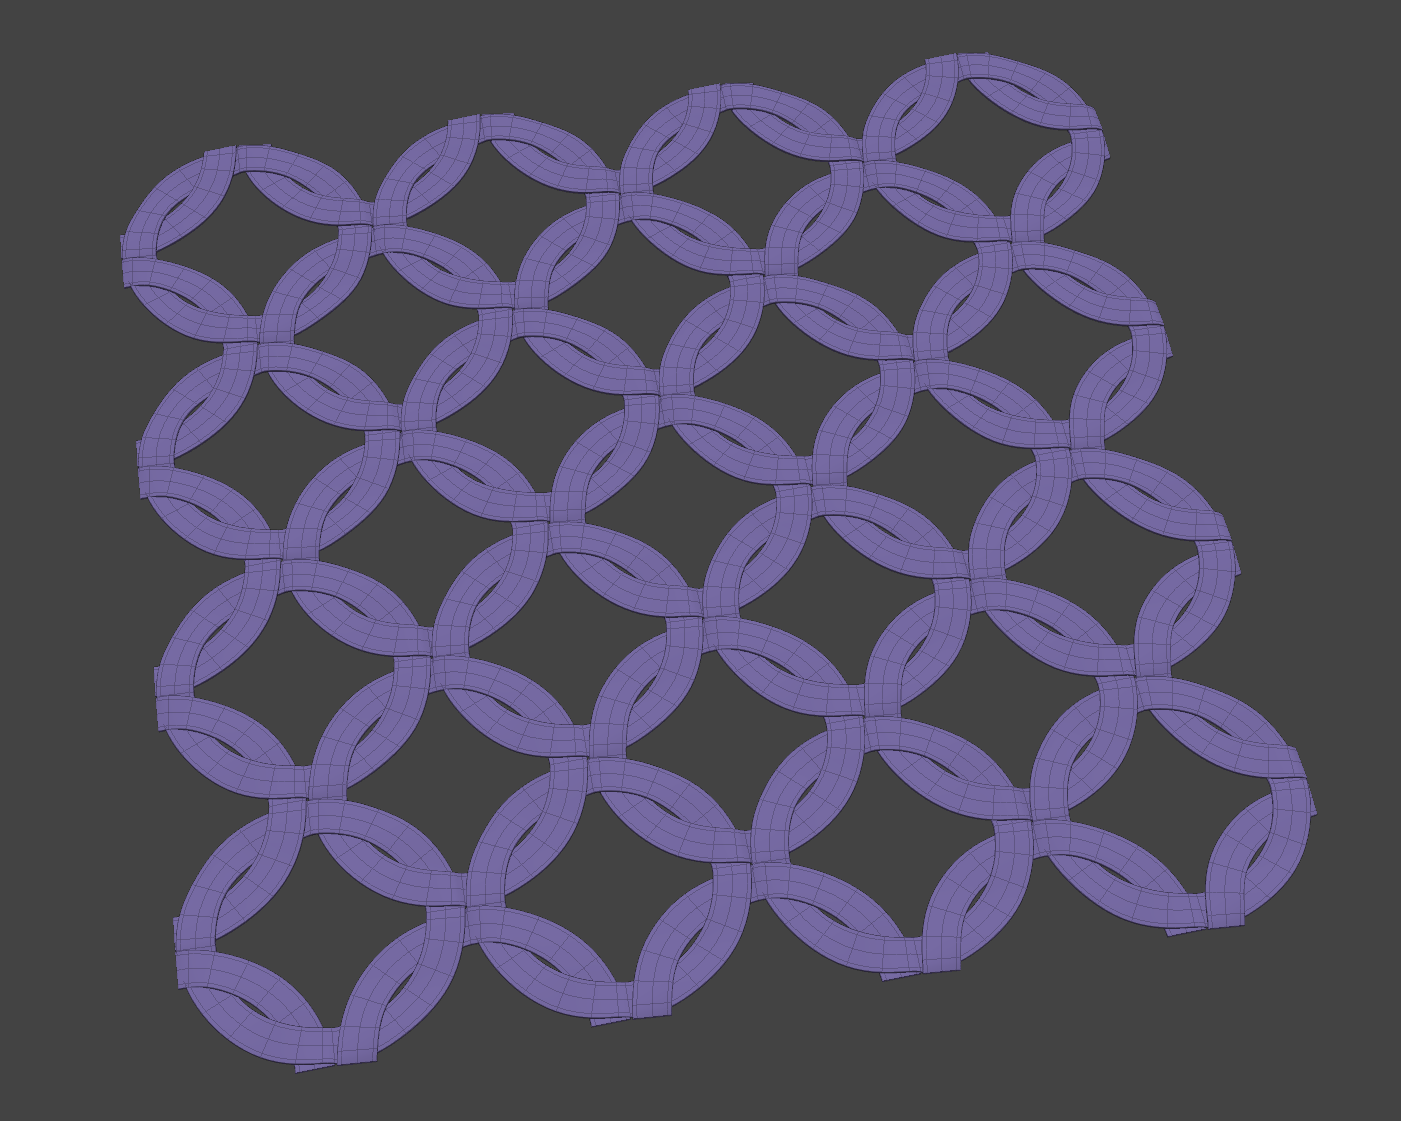
Imagine a client hands us a shirt in Marvelous Designer that has already been simulated to match a character, and with that delivery, we’re given a tiling chainmail mesh. Now, they ask us to change that fabric shirt into a chainmail top, using the chainmail geo, in a way that can then be simulated.
Trying to manually place thousands of metal rings onto a moving, folding shirt would be a nightmare. Even if you managed it, dealing with notes would only compound the difficulty.
But, if we use our blendshape trick, we lay the chainmail pattern onto the flat version of the shirt, and it automatically wraps itself into the 3D shape, following every fold and ripple perfectly. When the client has a note or a base model change, we just update the blend and deal with the note.
A similar result can be achieved using a vertex transfer via UV maps, but I prefer the blendshape method. It acts like a dimmer switch instead of just an "on/off" toggle. This gives us precise control – for example, we can dial in a 50% blend to influence the shape. With this workflow, it’s all very simple.
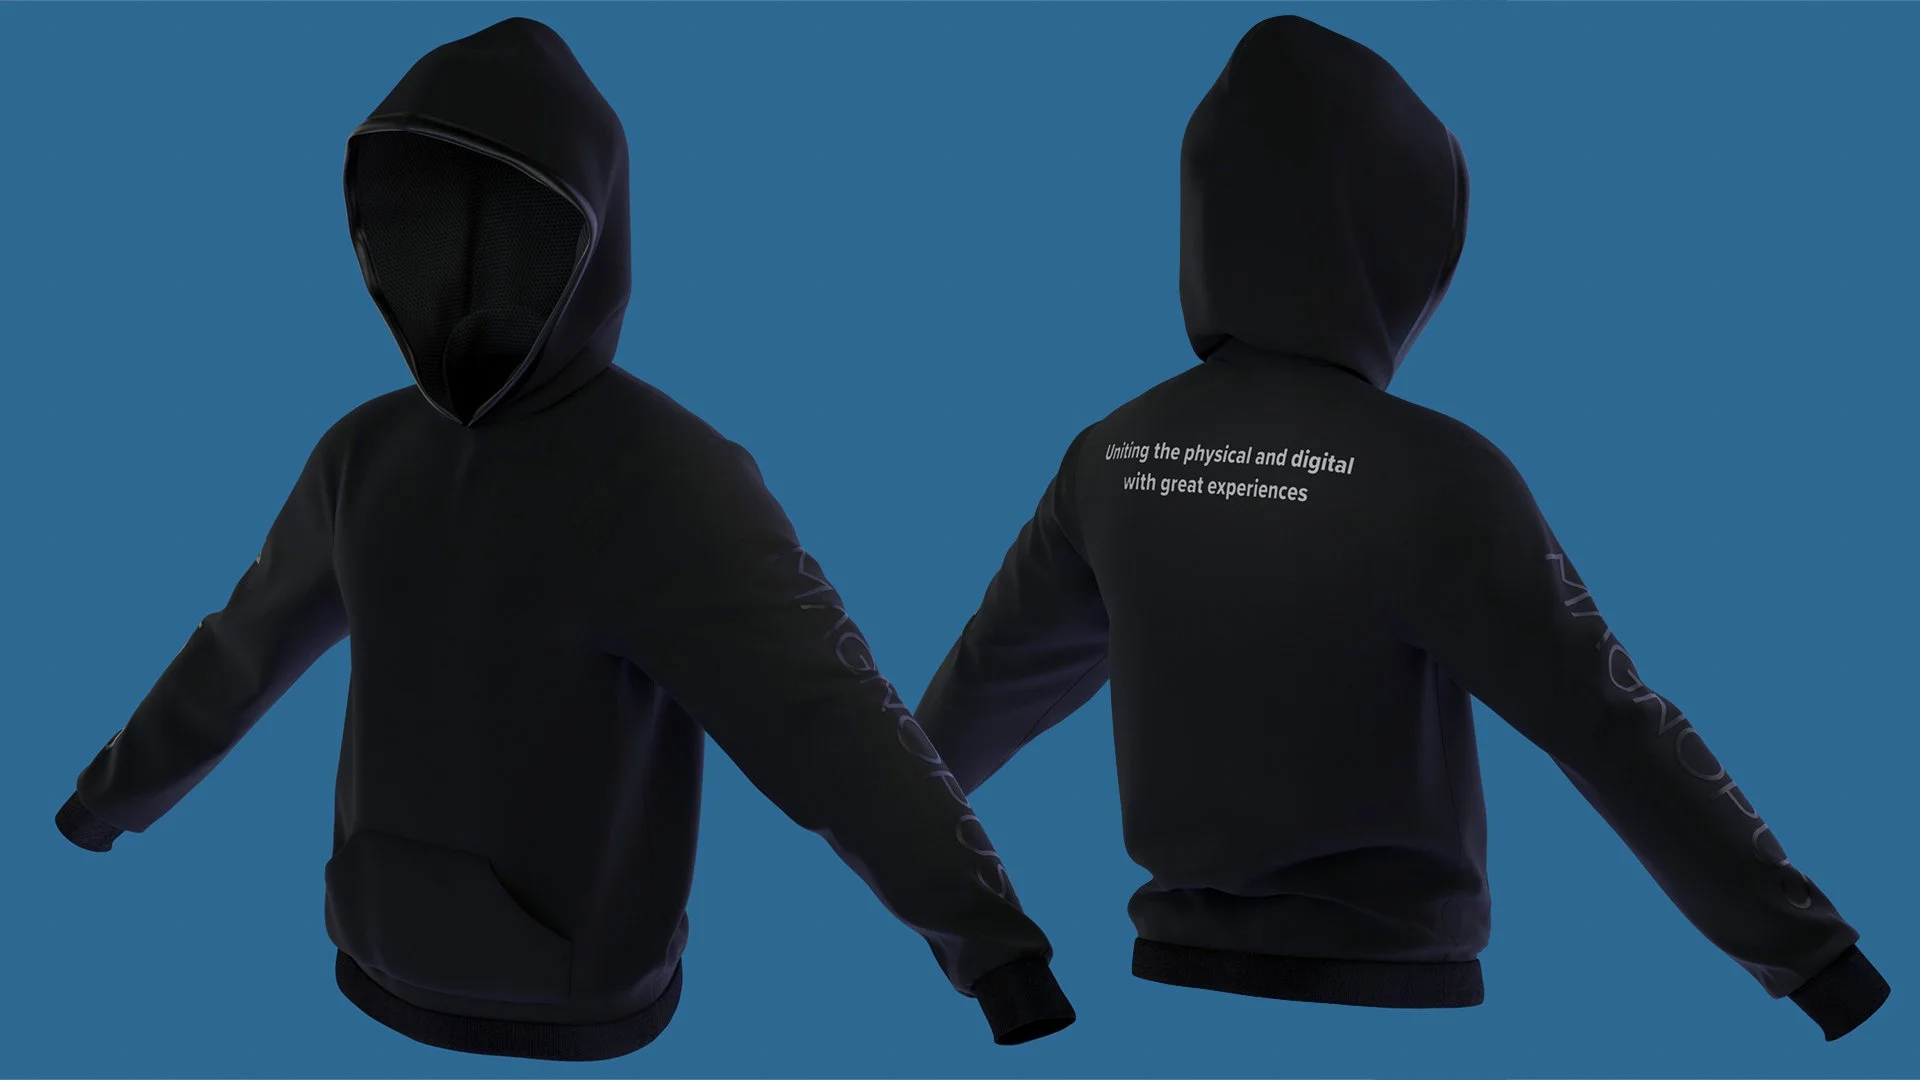
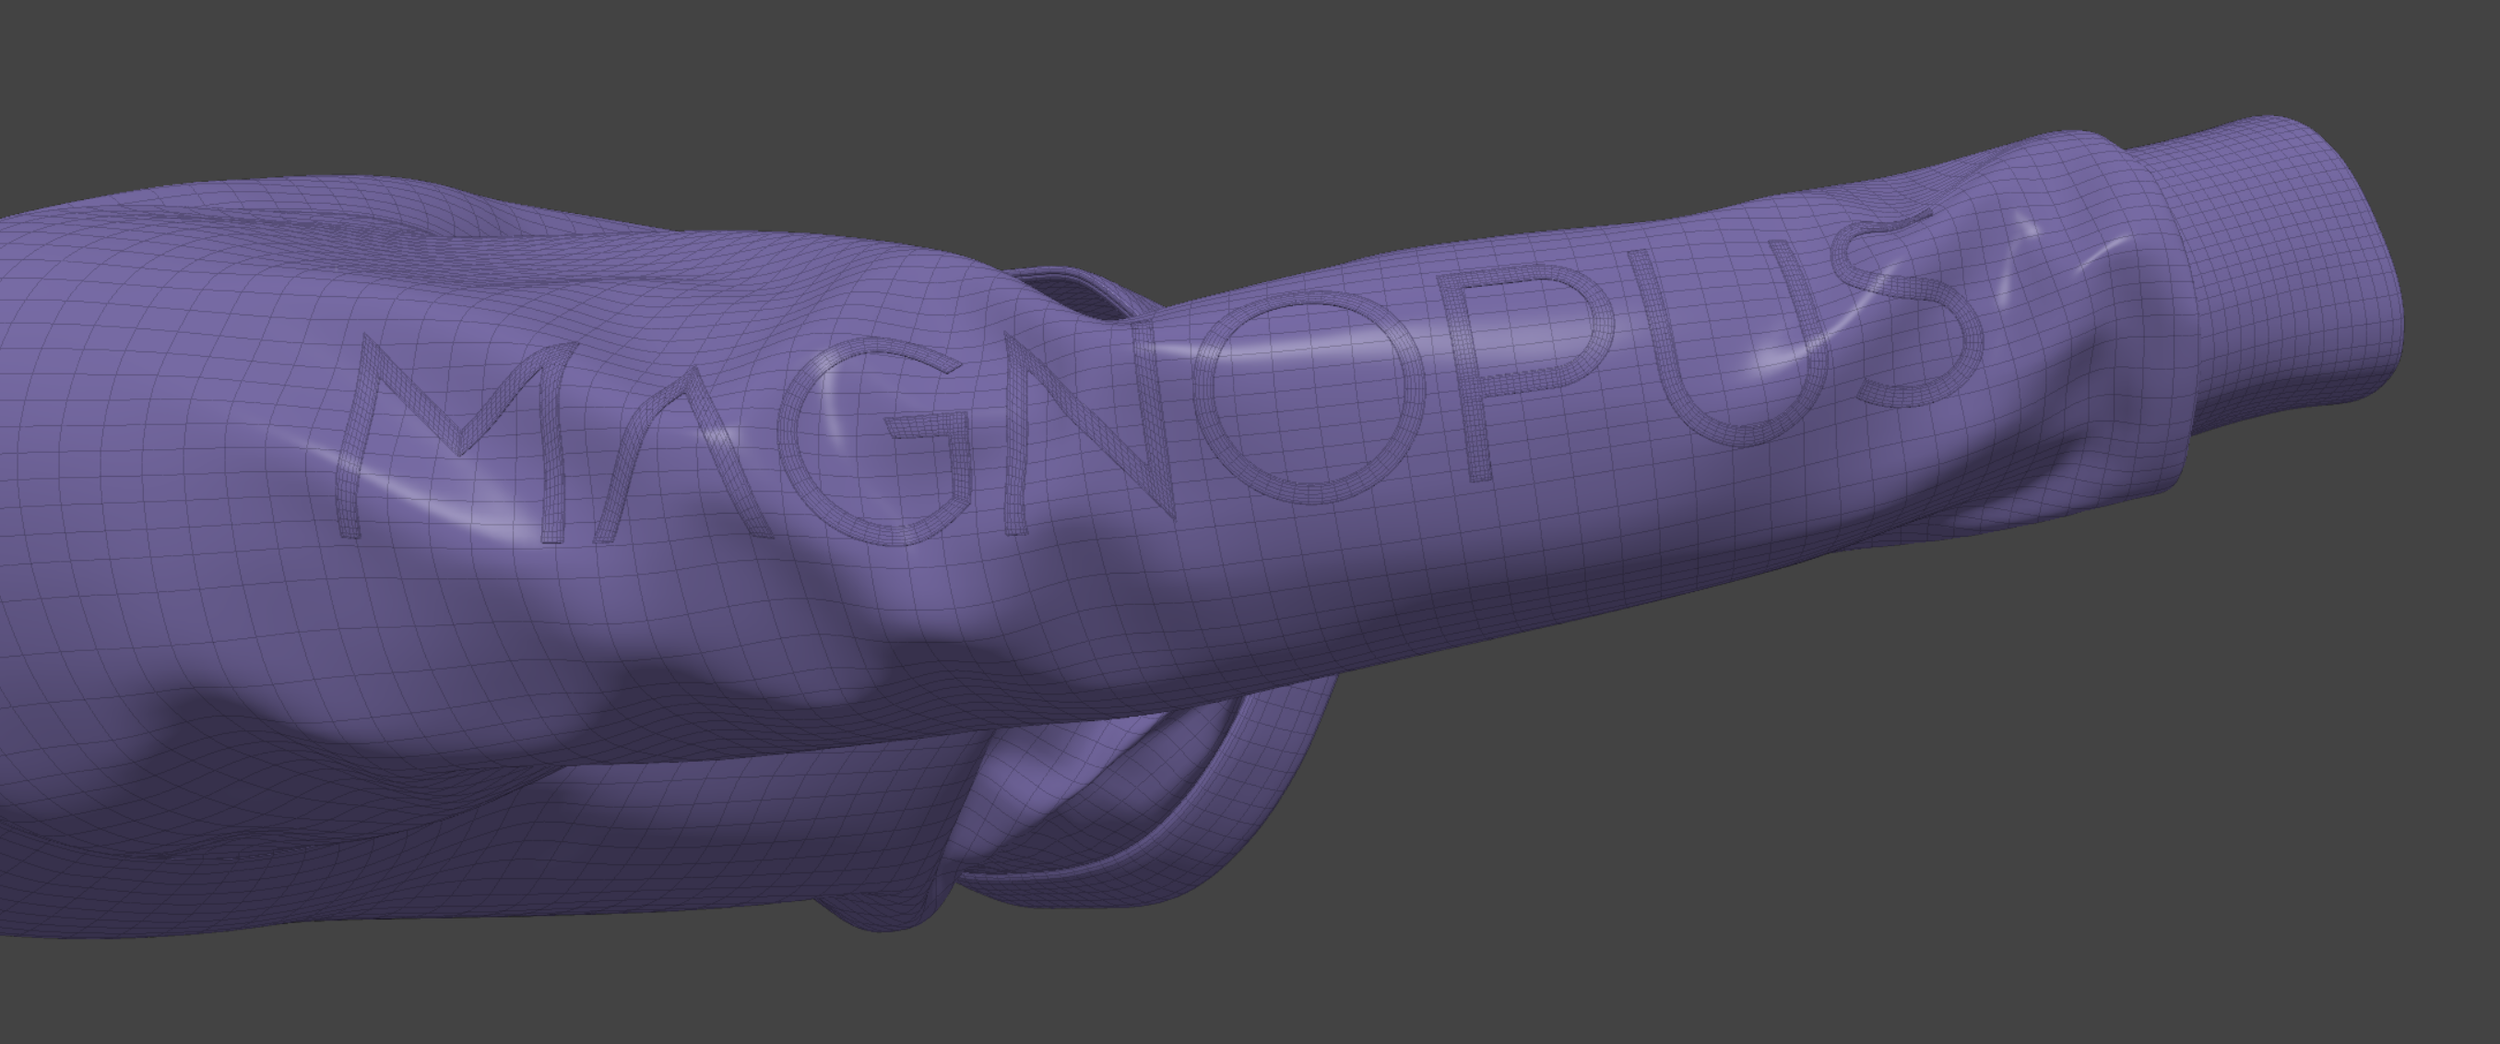
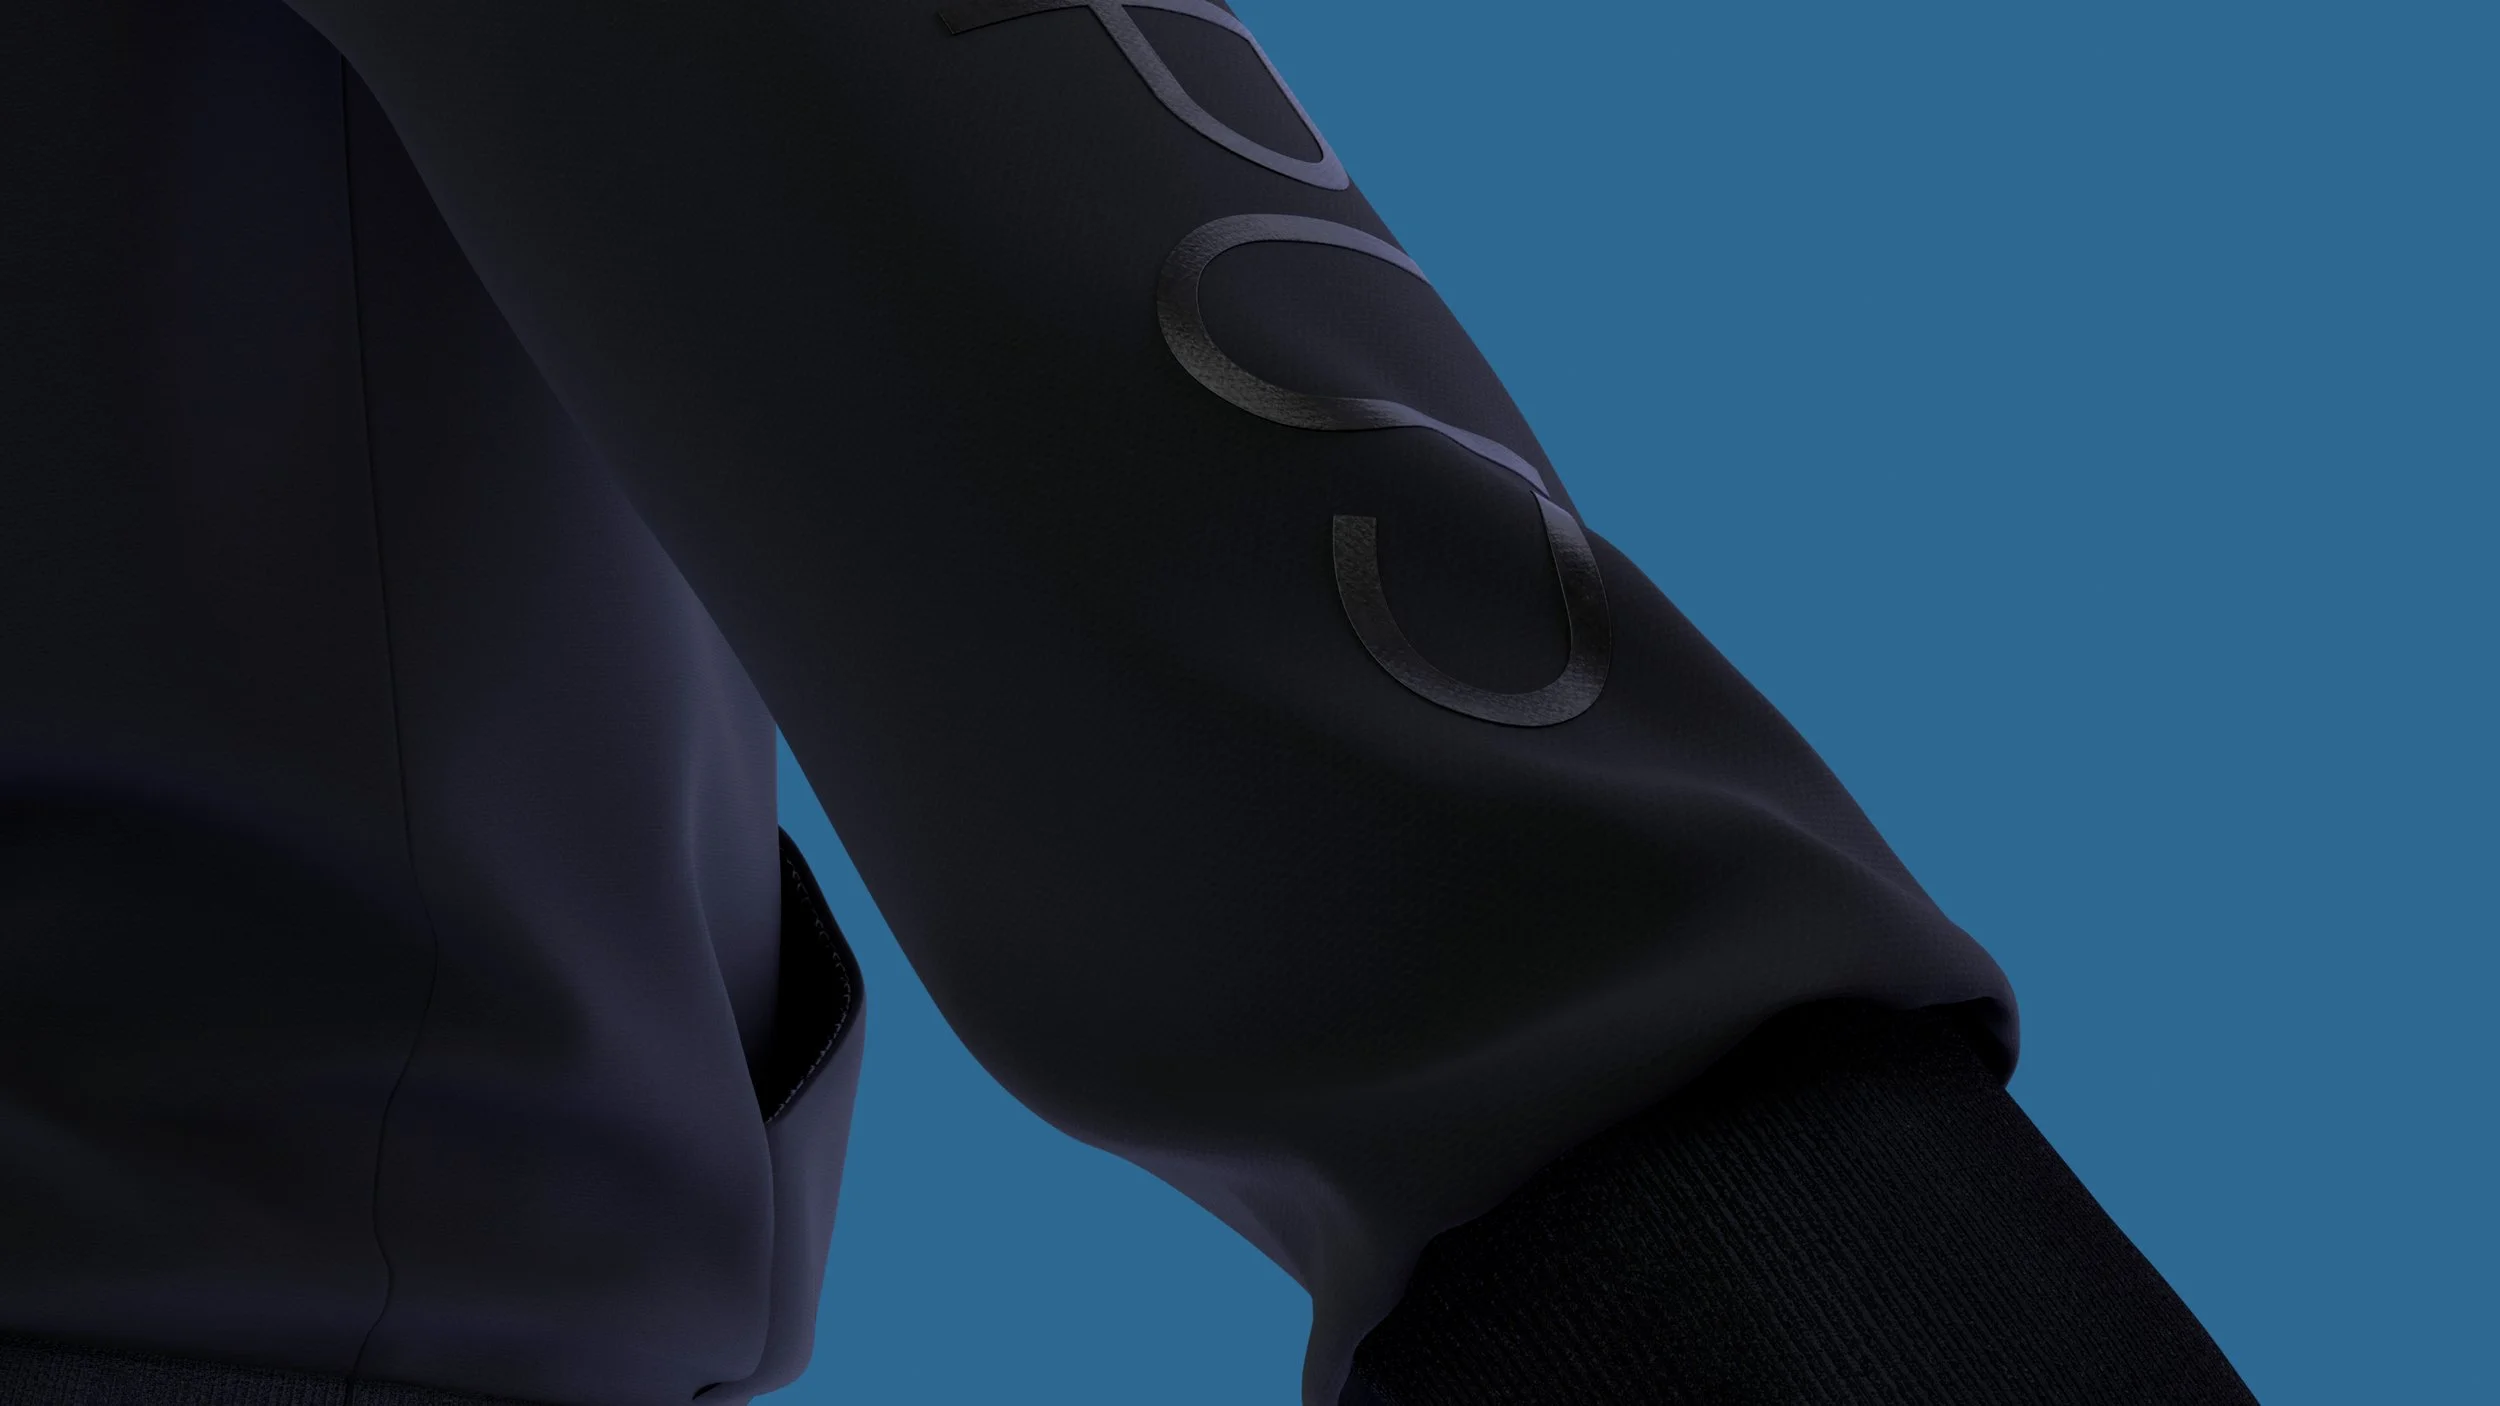
This technique isn’t just for big construction projects like boats; it’s also perfect for quick customizations. If we want to show a potential client something impressive or create branded merchandise, we can use this exact same process to add logos to clothing. It is an especially powerful approach when we have received a pre-simulated mesh, with unusable base topology (such as that Marvellous Designer produces), where we can quickly rebuild it into a working asset.
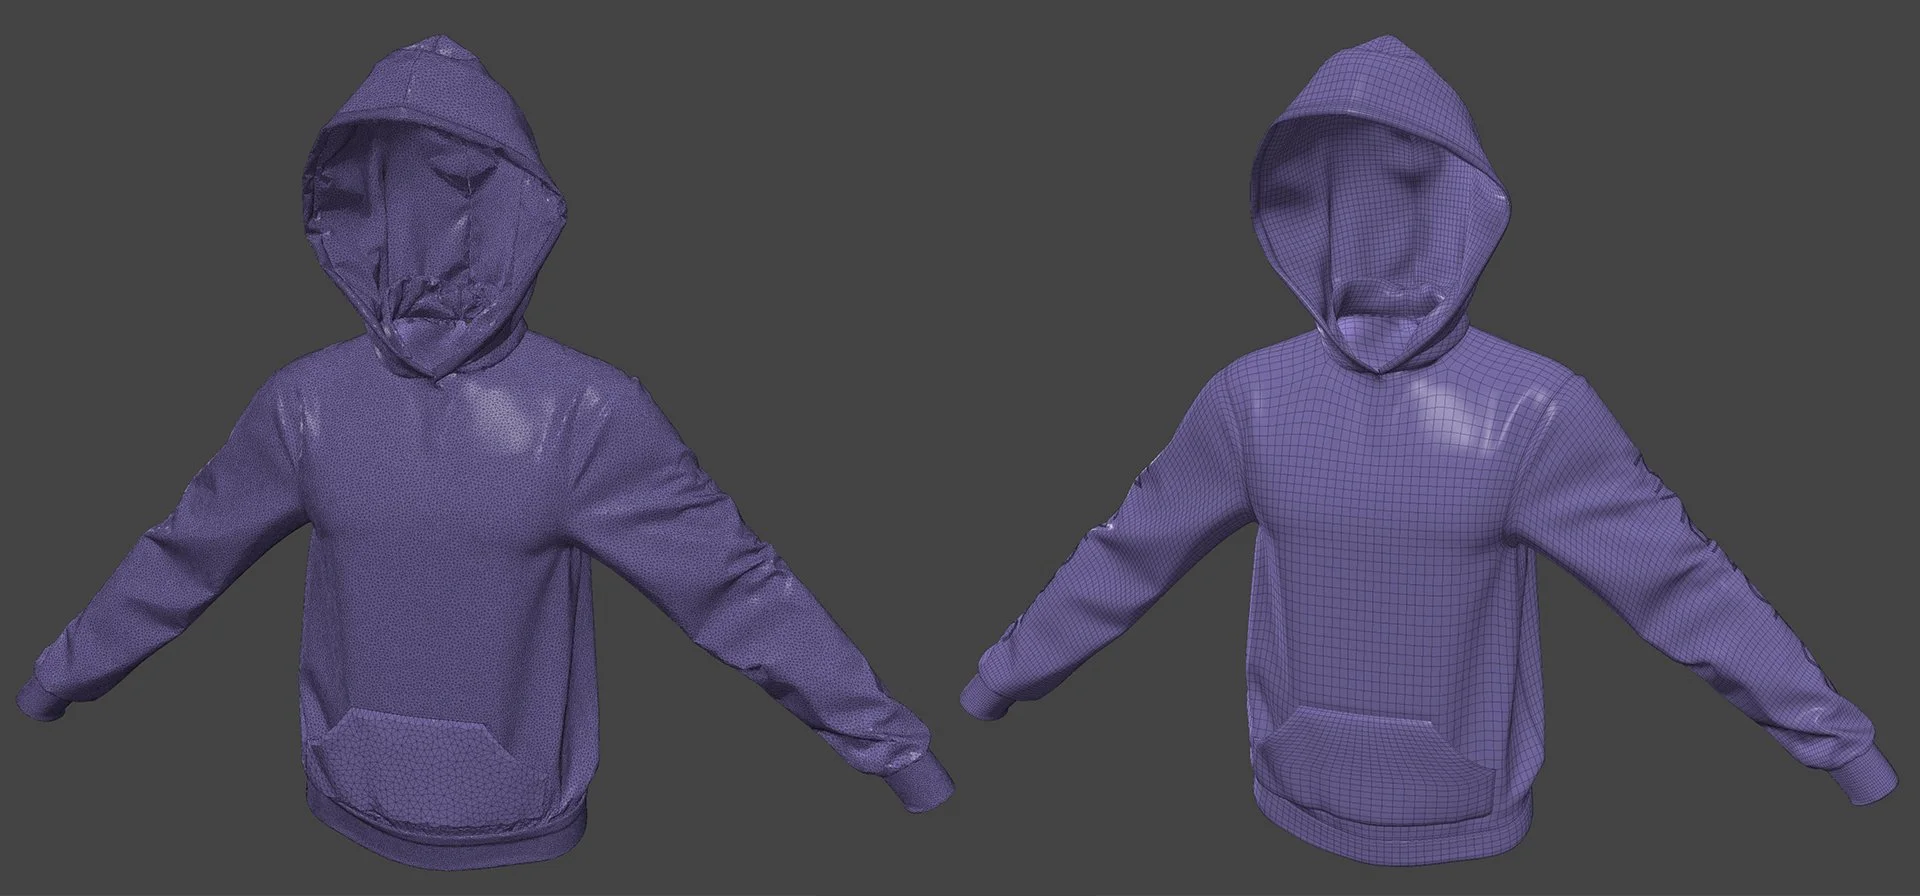
We can then take a company logo, like the Magnopus logo and "flow" it onto the hoodie. Because it is "wrapped" using the blendshape, it doesn't just look like a flat sticker. It follows the folds and wrinkles of the fabric perfectly, giving us a real-world result. We can swap different logos or designs in and out in seconds, allowing us to show a client ten different branded options in the time it used to take to make one.

As you can see, by shifting our mindset and adopting these smart techniques, we can build very complex designs without getting stuck in slow, old-school construction methods. One artist can work on the blendshapes, while another prepares textures, another the patterns to deform onto the final shape, etc. The workflow can be run in parallel, further increasing the turnaround speed of any potential tasks.
We can create high-end, detailed work in a fraction of the time without the need for long and tedious processes. Because the system is flexible, we can handle client feedback and design changes rapidly rather than starting from scratch. By letting the blendshape handle the hard work of bending and wrapping shapes, artists can spend more time on the details that make the project look amazing.
We aren't just working harder; we’re working smarter. This workflow ensures we stay on schedule, stay within budget, and deliver a final product that looks like it belongs on the big screen. Because we have our base patterns laid out, we can also swap in low-res, real-time-ready assets, run the wrap, and we are good to go!
This workflow is a game-changer; I highly recommend testing it out and adding it to your creative toolkit.
You can find the script here: https://drive.google.com/file/d/13Ux-_TKt6tob832LrmajhSMqU1_Ny6le/view?usp=sharing